
Do you guys remember the geometric abstract cake I shared a few months ago, inspired by Marina Sousa’a Craftsy class?
Well, some people asked me how I made those diamond and circle pieces.
So, I did a tutorial to help you guys along…Enjoy! 🙂
To make these cupcakes, you will need the following supplies:
Yellow gumpaste
Black gumpaste
Black edible marker
Rolling pin
Paintbrush
Big and small circle cutters
These are the instructions:
Step 1:
Roll our yellow and black gumpaste.

Step 2:
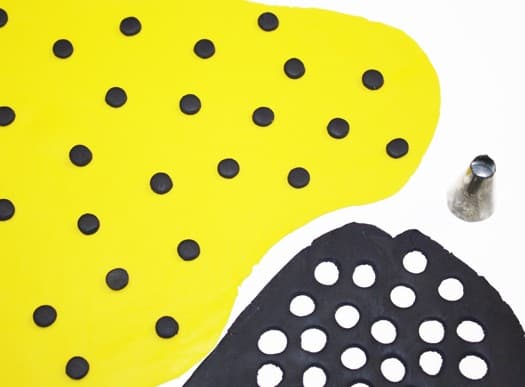
Use a small circle cutter (or Wilton’s Tip#12) to cut out tiny black circular pieces.
Place them randomly on top of the yellow gumpaste.
Step 3:
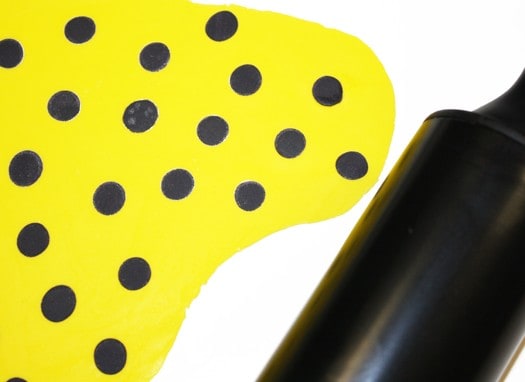
Flatten the small black circles by rolling on top of them with a rolling pin.
Step 4:
Use a small circle cutter (or Wilton’s tip #366) to cut out some abstract circular pieces.

Step 5:
You can use various sizes of cutters or tips to cut out various sizes of circular pieces.
Your pieces should look like this…

Step 6:
Let’s make the diamond pieces now.
Roll out yellow gumpaste.

Step 7:
Use a big circle cutter to cut out some circular pieces.

Step 8:
Use your thumb and index finger to fold the circle, as shown in this picture.

Step 9:
Then, fold again like this…

Step 10:
Pinch the corners so that they stick together and the diamond hold its shape.
And you will end up with something that looks like this…

Step 11:
Roll out a small ball of black gumpaste and flatten it.
Then, stick it in the center of your diamond piece with some water.

Step 12:
Use a black edible marker to draw along the outlines of the diamond pieces.

Now, just arrange the circle and diamond pieces on your cupcakes.
And you are done!

Well, I hope you enjoyed this tutorial.
Happy caking everyone!
Leave a Reply