
Kawaii is a Japanese word for “cute” and it has become an popular genre of cake decorating. To create a fresh version of Thanksgiving cupcake toppers, I gave the traditional turkey a kawaii spin. These adorable fondant toppers are sure to get a great reaction from the kids at Thanksgiving!

This what you need list:
Work surface
Corn starch
Rolling pin
Large PMI Daisy cutter
Round cutters in 2.5, 1, and .5 inches
X-acto knife
Stick tool
Black pearl sprinkles
White icing writer
Fondant in black, white, yellow and varying shades of brown
Not pictured:
White food coloring
Tiny paint brush
#12 piping tip
Black and yellow edible marker

Step 1: Dust the work surface with corn starch and roll out the yellow fondant. Cut out desired number of yellow circles for the toppers. These will be the backgrounds.

Step 2: Next roll out a dark brown fondant. Use the daisy cutter to cut out one daisy per topper. This will be the tail of the turkey.

Step 3: I was making five toppers so I cut out five daisies.

Step 4: With a rolling cutter or X-acto, trim off the bottom five daisy petals.

Step 5: Dampen the back of the remaining daisy and attach it to the yellow background. The one-inch circle cutter will form the oversized head of the turkey. The half inch round cutter will form the small body.

Step 6: Once the tail feather piece is in place, you can use your round cutters to gently mark where the head and body of the turkey will go.

Step 7: Using your cutters, cut out the head and body for each turkey and attach them in place with water. The heads are a slightly darker shade of brown than the bodies.

Step 8: To make the eyes, you will need the stick tool, black pearl sprinkles and icing writer.

Step 9: Use the stick tool to depress a dent where each eye will go. The eyes should be low and wide set.
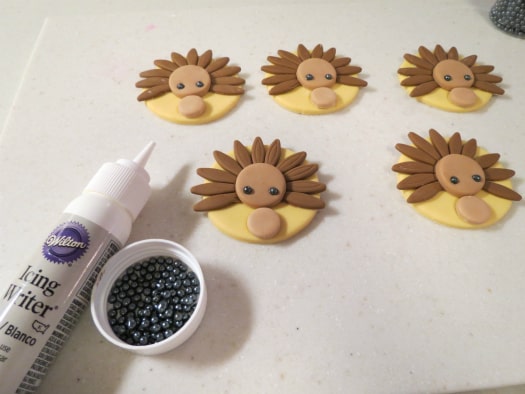
Step 10: Carefully add a tiny dab of icing writer in each dent. This will act as glue to hold the black pearls in place. (Any edible glue such as royal icing will do.)

Step 11: This is what they look like after the eyes have been gently pressed in place. I added tiny triangles of yellow fondant for the beaks.

Step 12: Using a medium brown fondant, roll two small tear drop -shaped pieces and attach with water. These are the wings.

Step 13: Next roll two tiny balls of yellow and attach with water as the feet. Press each one 3 times with a toothpick to shape them.

Step 14: To make the little pilgrim hats, I used the .5 inch round cutter for the brim and a #12 piping tip to mold the top. Attach them together with a dab of water.

Step 15: Attach the tiny pilgrim hats to the turkey heads on a cute angle using a dab of water.

Step 16: These final steps are optional to add fine details to the toppers. Add a tiny white fondant square to the front of each hat for the buckle. Then use a tiny paint brush and white icing color to paint a pointy collar and white band on each hat.

Step 17: As a final touch, color in the details of the buckle with black and yellow edible marker.
Now you know how to make cute turkey cupcake toppers. I hope these cute turkeys bring a smile to the faces of your guests on Thanksgiving! I know they made me smile!
Happy Caking!
Renée
This tutorial was created by Renee Daly.
These are adorable!
Thanks for this post.
You are welcome! I’m glad you like them!
SUCH cute Turkeys! The hats are a killer! Lovely work 🙂
Thank you!!????
Very cute.
Thank you 🙂