
With Valentine’s Day approaching, I thought I would show you how to make a collection of themed cookies. With so many girly options about, this is one for the boys! Boxer shorts and tees!
This is what I used:

Cookie dough
Large rolling pin
Cutters: Heart, Rectangle (6.5 x 4.5 cm) Baby Grow (though you can use a t-shirt cutter if you have one).
Coloured fondant – Red, White & Black
Gel or liquid colours (I have used Wilton Red Red and Wilton Black)
Glass of water
Paintbrush
Pastry brush
Small sharp knife
Small rolling pin.
Step 1:
Roll out the cookie dough and using the cutters, cut out hearts, rectangles and baby grows (or t-shirts if you have a t-shirt cutter). Then cut a small triangle from the rectangle (longest side). Then cut the bottom part of the baby grow, as in the picture below.


Step 2:
Then taking the rectangles (boxer shorts), use your thumb and forefinger to gently squeeze in to make waist as seen below. Then put both the boxer shorts, t-shirts and heart cut-outs onto a baking sheet and bake in the oven.

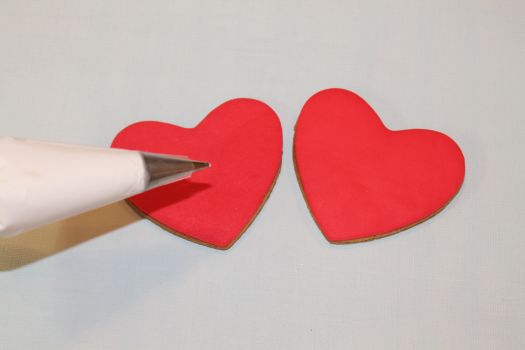
Step 3:
Once cooked, Roll out some red fondant and with the same clean heart cookie cutter, cut out the fondant. Then using a pastry brush (or paint brush), very lightly dampen the cookie surface with water and stick the fondant very gently to the cookie, pressing lightly.

Step 4:
In the same method as the cookie dough, cut out the tee-shirt and rectangle boxer shorts (remembering to lightly squeeze the sides again) as before and stick to the cookies with a little water. I have used both red, white and black fondant here for variation.


Step 5:
Fill a bag with white royal icing and using a no.2 PME tip, pipe lines along the sleeves of the t-shirts.

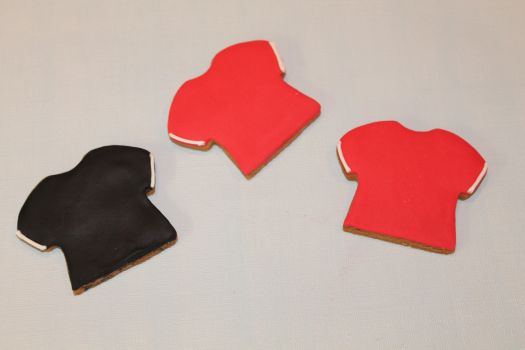
Step 6:
Fill a bag with black royal icing and pipe an outline on the boxer shorts (as below). I then added little hearts to mine, but you can decorate how you choose.

Step 7:
Then for my little heart beeps, I piped white zig zags onto my fondant covered heart cookies.

Step 8:
I finished by adding flirty slogans on my tees.

Happy Caking!
Gillian
These are absolutely adorable and so incredibly unique!
These are adorable- especially love the customized flirty t-shirts. Thanks for sharing!
Nice tutorial Gillian. I love all the little details!
Wonderful tutorial! Thank you!
brilliant tutorial Gill, very clever and yet such a simple idea that most people will give it a go as you make it look easy….love the step by step guide…very helpful. will be trying these out very soon.
Hi Louise,
I am an avid reader of your blogs and find you so very talented.
How long do you think the Valentine’s Cookies would keep for in an airtight container?
Keep the ideas flowing.
These are so very cute! Great tutorial Gillian