• Skip to primary navigation
  • Skip to main content
  • Skip to primary sidebar

Cake Journal

  • Cake Lounge
    • Easy Embossed Cookies Recipe
    • How to Make Heart-Shaped Cake with Buttercream Roses
  • Desserts
    • Best 3 Cookie Scoop Sizes and How to Use Them?
    • Babycakes Cake Pop Maker Review and Tutorial
  • Recipes
    • Traditional Castella Cake Recipe
    • Stabilized Whipped Cream Frosting (Easy Recipe)
    • Best Frozen-Themed Cake Ideas with Images
  • Tips & tools
    • What to Do With Cake Scraps? (8 Easy Recipes)
    • Luster Dust: If You Don’t Know About It, You Need To!
    • How To Use Edible Glue and How to Make It
    • How to Use Russian Piping Tips and Tutorial
    • What Is Wafer Paper and How to Use It? (Video Tutorials)
  • Tutorials
    • How To Make Royal Icing (Easy Recipe)
    • How to Flood Cookies with Royal Icing?
    • How To Use Candy Molds Properly
    • How to Make Cake Pops: Easy Step-by-Step Tutorial
    • Fondant On Cookies: Easy Way To Decorate
  • About Us
  • Contact

How to Make a Chocolate Gift Box Topper

March 18, 2015 by Louise 1 Comment

chocolate gift box cake topper

The cake I am sharing with all of you today is decorated with a cute chocolate gift box topper. It’s completely edible, really easy to make and great for many different occasions.

You can fill it with whatever seasonal candies you like.

You can also hide a surprise inside it and seal it completely and use it as a topper for for birthday cakes. It would be fun for the birthday boy or girl to open 🙂

To make this cake topper, you will need the following supplies: 

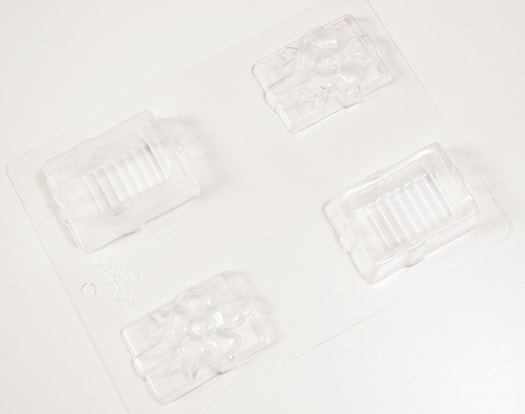
Gift box chocolate mold
Melted milk chocolate
Red, green and yellow m&m candies
Spoon
Paintbrush
Corn syrup
Edible gold spray
Wax paper

These are the instructions:

Step 1:
Wash your chocolate mold and let it dry.
If there is any dust in the mold, it will stick to the chocolate and look yucky!

chocolate gift box 1

Step 2:
Melt chocolate in the microwave.
Spoon it into the mold cavities.

chocolate gift box 2

Step 3:
Tap the side of the mold so that the chocolate spreads properly into the corners of the cavity.
Chill in the freezer for 10 minutes or until the chocolate hardens.
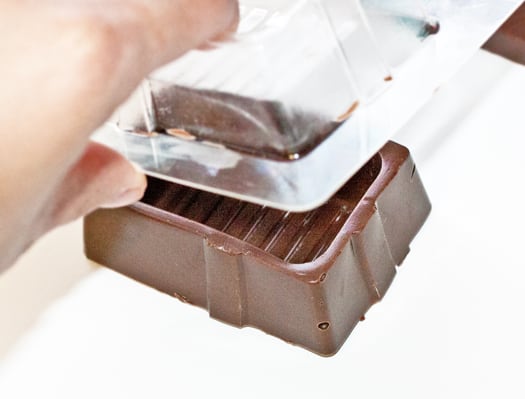
chocolate gift box 3

Step 4:
Gently turn the mold onto your counter, lined with wax paper.
Tap the top of the mold and the chocolate piece will come out.
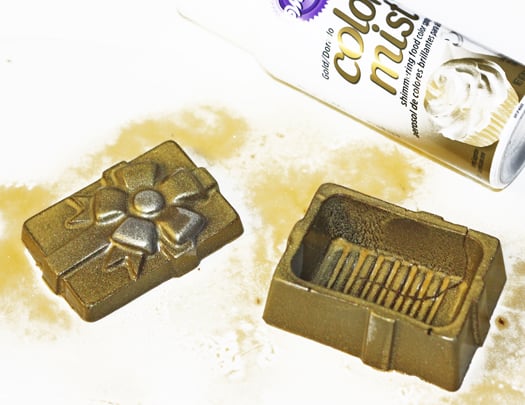
chocolate gift box 4

Step 5:
Spray the chocolate gift box with gold edible spray.
Let the paint dry at room temperature… it takes about 15 minutes.

Tip:
Don’t try moving the chocolate pieces when the gold paint is wet or else you will have smudges everywhere.

chocolate gift box 5

Step 6:
When the paint is dry, stick red and yellow m&m candies on top of the gift box (in the shape of a flower) using corn syrup.

Note:
At the last minute, I thought the gift box looked better without the red candies. So, I removed those and only left the yellow candy in the center.

chocolate gift box 6

Step 7:
Place the chocolate gift box on top of your frosted cake and fill it with red and green candies or whatever else you like.

chocolate gift box topper

And that’s it!

I hope you enjoyed this tutorial 🙂

Happy caking everyone!

Previous Post: « How to Make Shamrock Cupcake Toppers
Next Post: How to Make Poinsettia Cupcakes »

Reader Interactions

Comments

  1. linda

    March 18, 2015 at 5:14 PM

    Where did you buy the choc mold? This is a cute cake.

    Thanks for sharing.

    Reply

Leave a Reply Cancel reply

Your email address will not be published. Required fields are marked *

This site uses Akismet to reduce spam. Learn how your comment data is processed.

Primary Sidebar

Search Recipes on Cake Journal:

About Us

Kristen is the author of Cake Journal and a graduate of the Professional Baking program at Renton Technical College. She has worked as a pastry chef at a top Seattle restaurant and loves sharing her passion for baking amazing cakes on this site.

Contact Me

Privacy Policy

As Seen On:

Follow Us on Pinterest

Copyright © 2023 · Cake Journal