
June brings graduation season and lots of celebrations. These fun little toppers will take your cupcakes to the next level for that graduation picnic or school party.

This is what I used:
Work surface
Rolling pin
Water pen
Rolling cutter
Fondant in black, green, yellow and blue
Royal icing in a piping bag with a #1 Wilton tip
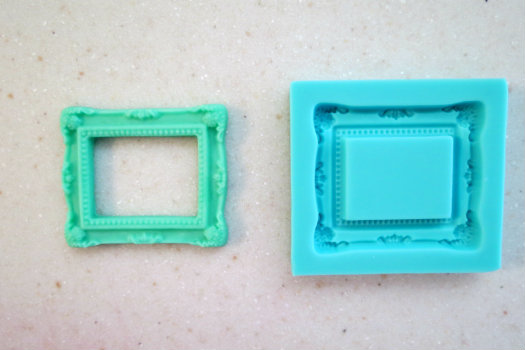
Martha Stewart Frames and Flourishes silicone mold

Step 1:
Roll out the black fondant and cut squares that are 1 1/2 x 1 3/4 inches. They don’t have to be perfect because the frames will be attached on top of them.

Step 2:
Place your desired color of fondant in the silicone frame mold. Every mold shape is different to work with. For this mold, it was helpful to start with a snake of fondant. Then press it in all the way around the frame. Then carefully trim it flush with a sharp paring knife being careful not to damage your mold. Then smooth it out with a cornstarch-dusted finger.
Step 3:
Place the mold in the freezer for 4 minutes. Then take it out, turn it over holding it above your work surface. Bend it backwards towards you, allowing the finished frame to gently drop out on the work surface. This is what the finished frame looks like.

Step 4:
This step was the most challenging for me. Use your royal icing to neatly write some simple letters and numbers on the black fondant squares. Keep them small and centered.

Step 5:
Allow the components to dry for a few hours to overnight. Then you are ready to attach the frames to the chalkboards.

Step 6:
Use your water pen (or a small wet brush) to dampen the outer edge of the black fondant square. Then attach the colorful border by laying it on top and pressing gently.

Make these toppers three days to a week prior to your event so they will be nice and firm when placed on your cupcakes. I like to store my decorations on a parchment-lined cookie sheet while they are hardening. For longer-term storage, use a breathable cake box.
Happy Caking!
Renée
You can also create “chalk” using a candy cigarettes recipe and rolling them thin and cutting them tiny and then attaching it to the “chalkboard” with a bit of corn syrup. (I don’t know if water would work in that case.)
Candy cigarette recipe:
https://www.ehow.com/how_5108236_make-candy-cigarettes.html
Oh I love this, the timing is perfect, as my Son’s graduation is just around the corner.
I love this. its such a great idea and so cute!
These are brilliant. Just what you need now at graduation and can be used again for going back to school.
You could even use them as treats if your child does well at school.
Thanks Margie, that’s true! In the list of tools I used, I hyper linked the frame mold so you can see where to get it online. Personally I bought it as my local Michael’s craft store. If you don’t have those near you, just search the name of the mold on Google to find places to buy it online.
These are great, can also be used for the first day back to school, report card day, and so much more! Where can you purchase the molds?