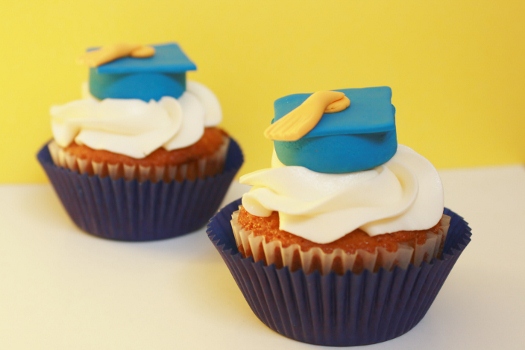
Graduation time is approaching and what could be more fun than serving your Grad, and his or her friend, with some simple and fun cupcakes? These cupcake toppers are easy to make and will take you no time at all.
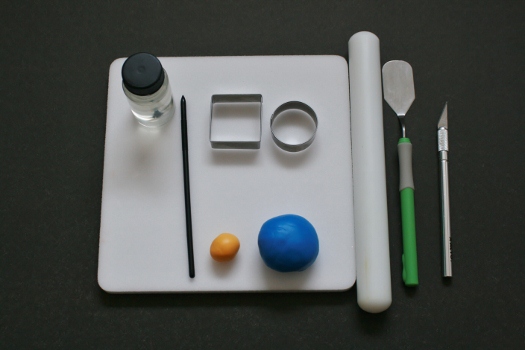
This is what I used:
Plastic mat
Rolling pin
Knife
50/50 gumpaste fondant mix (any two colour)
Round cutter
Square cutter
Gum glue
Pointed tool (a tooth pick would work)
Palette knife
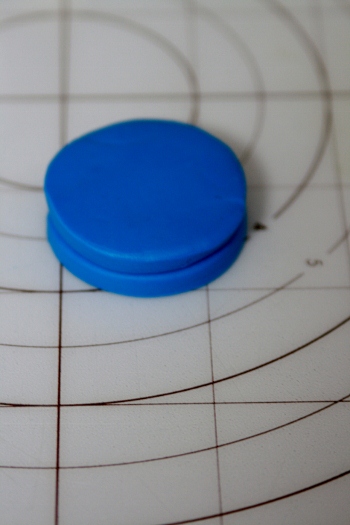
Step 1:
Roll out one colour of 50/50 mix. Roll it out about 1/2- 3/4 an inch thick and cut two circles.

Step 2:
Use gum glue and put the two round cuts together. Put it aside and let it dry.
Step 3:
Roll out the same colour 50/50 mix to 1/4 inch thickness and use the square cutter. You only need one square cut.

Step 4:
Put gum glue on one side of the square cut and add the joined circle cut on top of the square cut. Set it aside and allow it to dry for at least two hours. Once it has hardened, you will flip it over to work on top of the square surface. The circle surface will be the bottom.

Step 5:
Roll a small amount into a ball and roll another part into a “worm”. The “worm” should be quite think. Press the ball flat. This will be the top part of the cap. Use the second colour of 50/50 mix.

Step 6:
Cut the “worm” into a one inch length. On one end of the cut end flatten 1/4 of it with your palette knife.
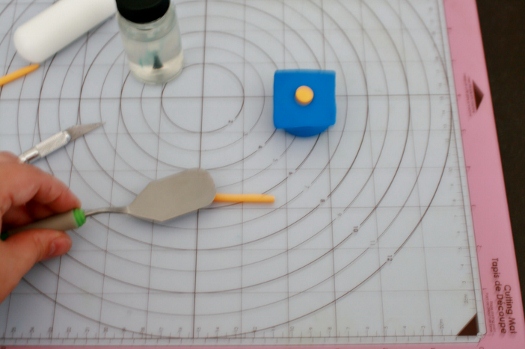
Step 7:
Use your stick or tooth pick and draw lines on the flattened end. This will create the illusion that the are ripples on the tassel.

Step 8:
Glue the flattened ball and the tassel onto the cap.

Happy Caking!
Diane
Leave a Reply