
A full blown zombie craze in happening and it only seems fitting to create treats to go along with it. These red velvet filled zombie pops are the perfect dessert for your “Walking Dead” premiere party or Halloween fete.
A chocolate sucker mold makes this project fool proof but the fun really happens when you get to customize each zombie’s crazy expression. This may be the only time that that you go for a second helping of “brains”!
YOU WILL NEED:
Red Velvet Cake Pop Filling
Black Candy Coating
Light Green Candy Coating
Paramount Crystals (for thinning the coating)
Skull Sucker Chocolate Mold
Sucker Sticks
Paintbrushes
Craft Knife
Black Food Coloring Markers
Yellow M&M’s or similar candies

STEP 1: MELT COATING AND PAINT MOLD
Melt the black and green candy coating discs in the microwave on 50% power, stirring frequently until just melted (the black will be thicker than the green). Then, add a pinch or two of paramount crystals to the black coating and stir until you have a thinner consistency for painting (This step is necessary or the black will be too thick to paint).

Dab a thick layer of black coating on the eyes, nose and mouth of each skull making sure that you fill in each area thoroughly. Put the mold in the fridge for 5 minutes to harden.

Take the mold out of the fridge and paint a layer of green coating on the entire inside of each cavity, creating a shell. Place the mold back into the fridge for 5 minutes to harden. Remove, hold the mold up to the light, and touch up any areas that seem thin.

STEP 2: FILL THE MOLD WITH CAKE, ADD A STICK AND SEAL
Pinch a small portion of red velvet cake pop filling and press it into each mold cavity, leaving a 1/8″ gap for sealing the back.

Dip a stick in melted green coating and press it into the back of the mold making sure it’s adhered to the cake filling.

Spread some additional melted coating on the back of each mold to seal. Place the mold in the freezer for 15 minutes or so until very firm.

STEP 3: DECORATE
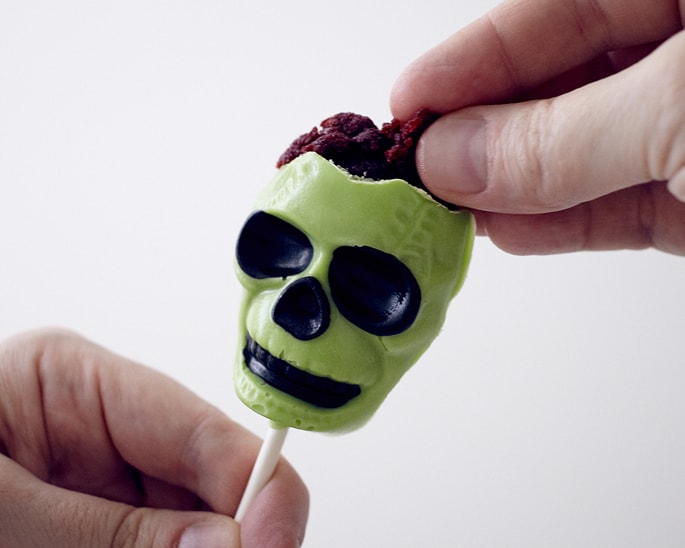
Gently pop each sucker out of the mold and let them come to room temperature. Use a craft knife to score and break off the top of each skull head, exposing some of the cake inside. This can be a little sloppy because you want their heads to look cracked.

Take a little extra cake pop filling and squeeze it on to each pop to make it have more “brains” exposed.
To finish, use a dot of melted coating to attach the candy eyes and then use a food coloring maker to draw the pupils, making the eyes a little different on each pop.

This site definitely has all of the information and facts I wanted about this subject and didn’t know who to ask.
Im so trying this 4 Helloween ^_~ Thankz ^_^
Sooo cool and an easy…. thanks for sharing!!!!
Those are awesome! What a great way to make cake pops….I wouldn’t have thought to use the candy molds. Thanks for sharing!!
They look wonderfully real! I love them. And…..they’re much more easier to make than i thought! Thanks for sharing this! You gave me hope that i can do that one day…. Thank you for that. Have a great day. Byebye. 🙂 🙂 🙂
I really like the idea to crack open the skull again, that makes it really Zombie like 😀 Cool idea. haha 🙂