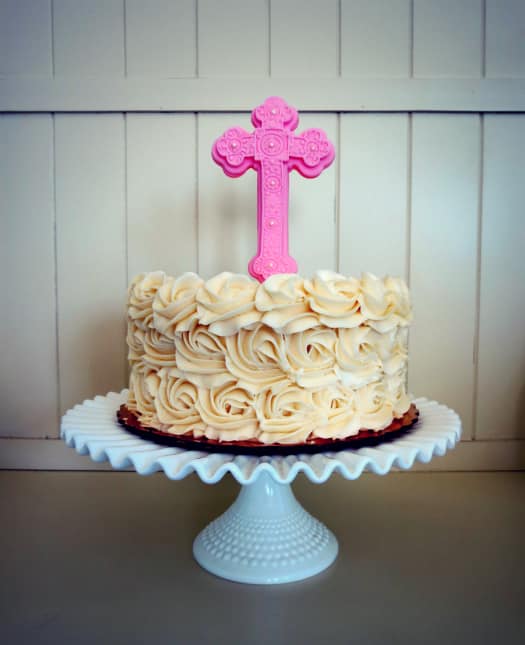
This beautiful, standing cross is a versatile and in-demand cake decoration. It is ideal for a Baptism, First Communion, Confirmation, or even a wedding. The color and design can be customized to your special occasion.
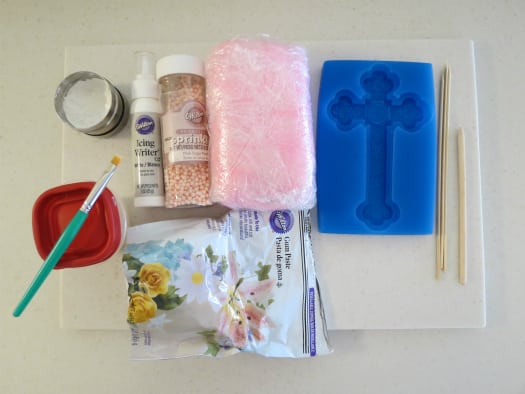
This is what you need:
Work surface
Pink fondant
Gumpaste
Cornstarch and small brush
Stick tool
Edible glue or water
First Impressions Large Cross Mold
3 eight-inch bamboo skewers
White Wilton Icing Writer
Large pearl sprinkles

Step 1: Dust the mold with cornstarch and tap out the excess.

Step 2: Combine 50 percent fondant and 50 percent gumpaste. Roll into a smooth ball.

Step 3: Stretch the fondant out to the size of the mold. With your fingers dusted in cornstarch, work from the bottom of the mold and press the fondant flush to the surface. Pinch away the excess fondant until the entire piece is flat.
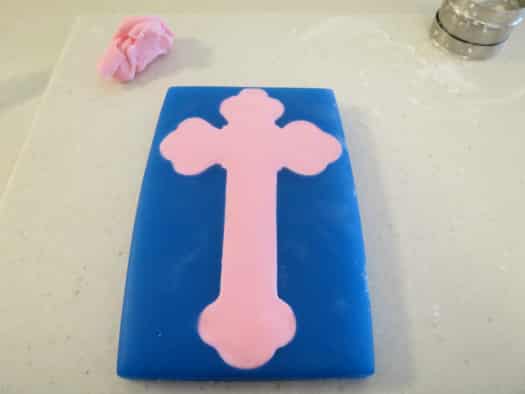
Step 4: You can use a rolling pin to ensure that the back is flat and even. Now place the mold in the freezer for five minutes.
Step 5: After five minutes in the freezer, remove the mold. Turn it over and bend it gently to release the cross.

Step 6: The cross will look like this.

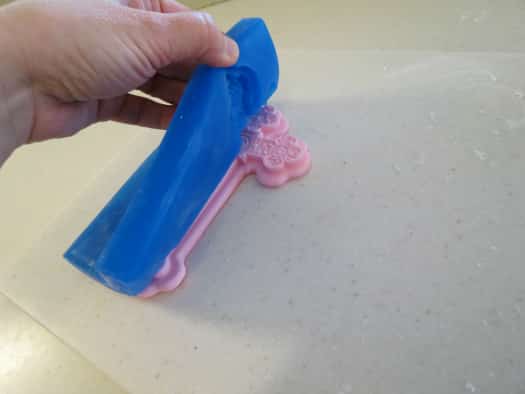
Step 7: Repeat those steps to make another cross. Take your 3 bamboo skewers and mark them three inches from the bottom. (This length will stick out the bottom of the decoration.)

Step 8: Turn one cross over and make an impression with the support skewers.
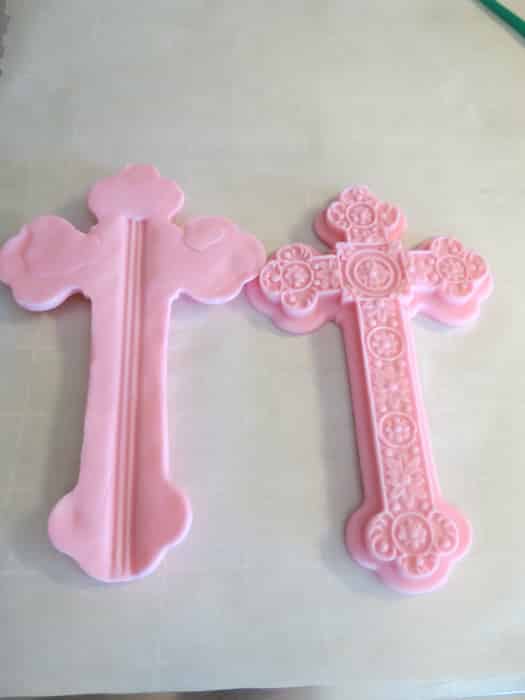
Step 9: The impression looks like this.

Step 10: Use your edible glue or water to wet the turned-over cross, put the support skewers back in place and carefully join the front cross to the back cross.

Step 11: Once joined, the decoration will look like this. Be sure to close the gap around the edge completely.

Step 12: To add the simple pearl accents, you will need the stick tool, icing wrier and pearl sprinkles.

Step 13: Use the pointy side of the stick tool to make small dents at the center of the seven flowers that are in circles. Put a tiny dot of icing writer in each dent, then place a pearl sprinkle in each dent.
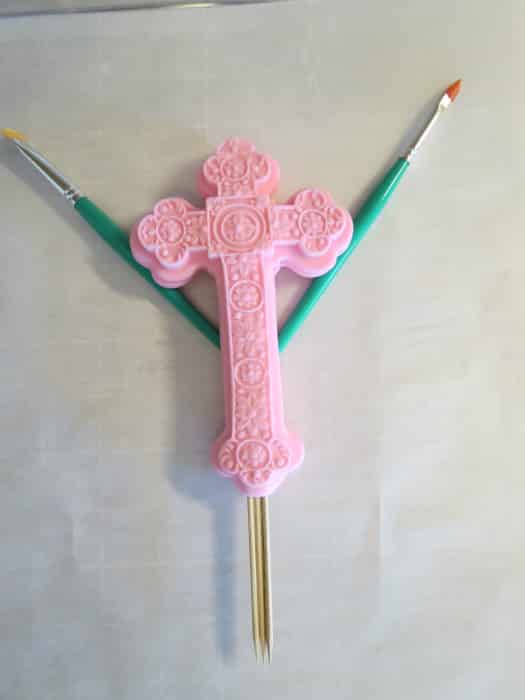
Step 14: Allow the decoration to dry on a parchment-lined cookie sheet for at last 7 days. If you see any of the border sagging, you can support it as it dries with paint brushes as shown above.
This type of standing decoration is best to add to the cake at the party location. You can use 3 clean bamboo skewers to create a guide hole before plunging the cross into the cake. The cross will look beautiful on any store bought, home made or even ice cream cake. Enjoy!
Happy Caking!
Renée
Leave a Reply