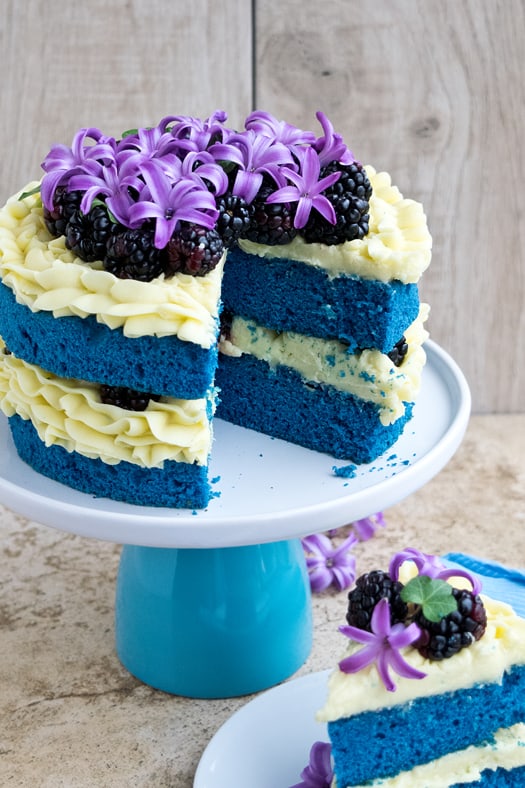
Naked cakes are so popular these days, especially for weddings! They are elegant and you can decorate them with fresh flowers or fresh fruits or both!
You can even make different colored frostings and different colored cakes to really match the theme of your event.
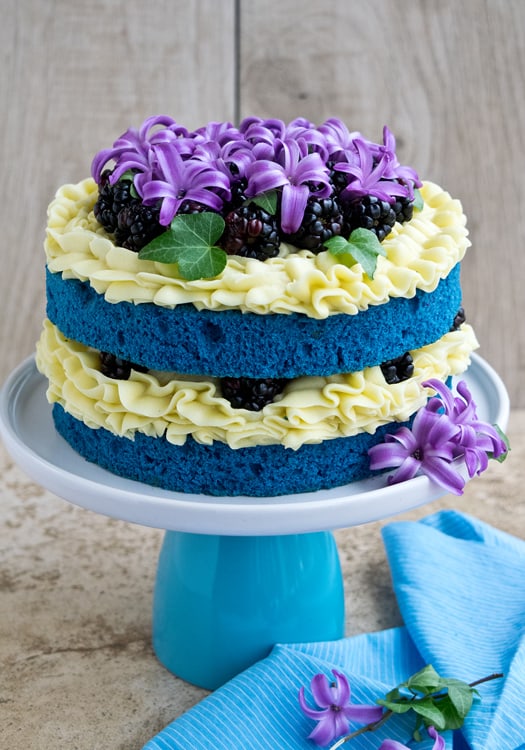
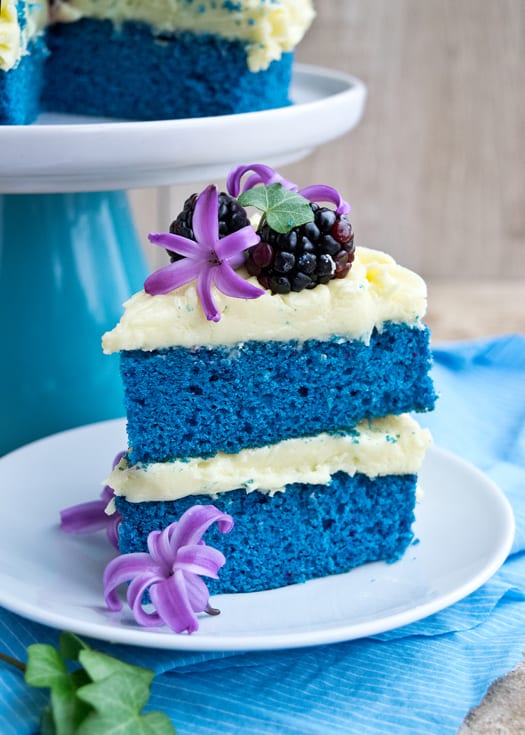
The cake that I am sharing with you today is a blue velvet nude cake with yellow icing, topped off with fresh blackberries and purple flowers.
The recipe for this cake and icing is vegan but it still tastes amazing! The cake is very soft and the icing is very fluffy 🙂
To make this cake, you will need the following ingredients:
Vegan blue velvet cake:
2 1/4 cups all-purpose flour
1 1/4 cups sugar
1 1/2 cup soy milk or almond milk
3/4 cup light olive oil
1 tbsp vanilla extract (the best quality you can find!)
3/4 tsp baking soda
1/8 tsp salt
3 tbsp lemon juice
Blue gel coloring
Vegan buttercream icing:
3/4 cup shortening
3/4 cup vegan margarine
4 – 4 1/2 cups powdered sugar
1/4 cup almond milk or soy milk
1 tbsp vanilla extract (the best quality you can find!)
Yellow gel coloring
Decorating:
Fresh flowers
Blackberries
Tip 1M
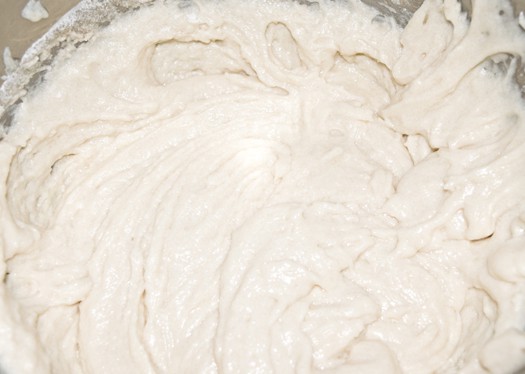
These are the instructions for the blue velvet cake:
Step 1:
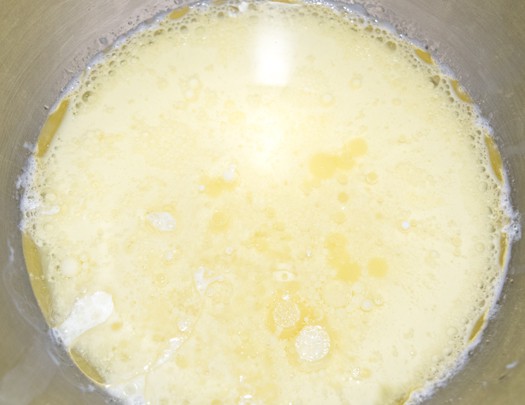
Add all the wet ingredients (milk, oil, vanilla extract and lemon juice) in a mixing bowl.
Step 2:
Mix everything until you have a fluffy mixture.
Step 3:
In a separate bowl, sift all the dry ingredients (flour, sugar, salt and baking soda).
Dump the sifted dry ingredients into your bowl of wet mixture.

Step 4:
Mix everything until just combined.
DON’T overmix!
Step 5:
Add blue gel coloring in the batter and mix thoroughly with a wooden spoon.
Pour the batter in two 8×2 greased and floured round cake pans.
Bake at 350 degrees for 40-45 minutes or until an inserted toothpick comes out clean.

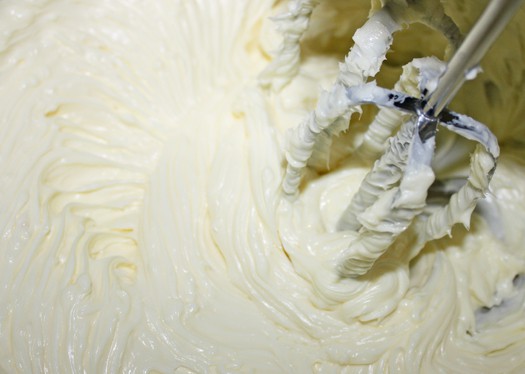
These are the instructions for the vegan icing:
Step 1:
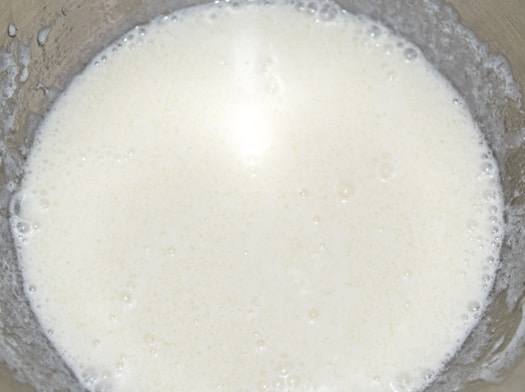
In a mixing bowl, cream margarine and shortening until you have a light and creamy mixture with no lumps.
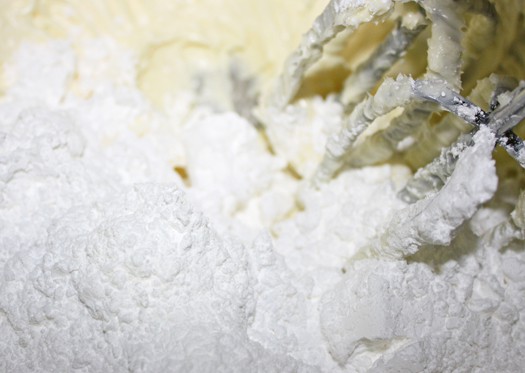
Step 2:
Add powdered sugar and milk and mix at low speed until you have a spreadable consistency.
If you feel that your icing consistency is too thin, add some more powdered sugar to thicken it (1/4 cup at a time).
If you feel that your icing consistency is too thick, add some more milk to thin it out (1 tbsp at a time).
Step 3:
Finally, add yellow gel coloring and mix again.

Once your cakes and icing are prepared, assemble the cake…
Start off by leveling your cakes.
Place one cake on a cake board.
Use Tip 1M to frost the top of the cake and place some blackberries as well.
Place the other half of the cake on top of the icing and blackberries now.
Use Tip 1M again to frost the top of the cake.
Finally, just decorate the top with fresh flowers and blackberries.
And you are done!
I hope you enjoyed this tutorial.
Happy caking everyone!
Could not believe myself for some time! Is it possible to design a cake like this? Truly awesome!!
Awesome colorful cake… 🙂
damn amazing cakes – blue shade is out of the box with flowering on top, eye catching style and very beautiful overall.
Thanks for sharing Blue Velvet Naked Cake it is very nice.
First time I meet a blue cake. Very striking colors. One of a kind. I like the decoration on top.
i think ice box is good for preservation in office & is good for travelling with cake.
Your cake is looking very spongy in nature. Its decorations is good to make anyone impress. I m impressed with this cake.
Nice blue toppings over this make it apart from others cake. We will happy to get at least one byte of it.
Looks really amazing…Great color chosen and great appearance…. Not sure whether it can have same appeal in taste as well.. 🙂
Stunning cake, Really awesome. A cake which i was looking for. A unique cake. I order cakes from Monginis online cake shop. But this time i will try this unique cake. Just waiting to taste this delicious cake. Thanks for the Great recipe.
I’m wondering also about drying out on the sides. Also, why do you call it “velvet”? I don’t understand the velvet cakes. They are the same as all other cakes, just dyed. Thanks.
The cake is gorgeous. Love the idea of blackberries in the icing filling.
Very striking cake! 🙂
What a Beautiful cake!!! How do you keep the cake from drying out when it is “naked”? Thanks for all your inspiration 🙂
Very pretty! I think this is just beautiful.