
I hear a new Minion movie is coming this Summer. But it’s hard to imagine these lovable characters getting any more popular than they already are!
Their cute goggles and facial expressions make them a big hit with the kids. These steps will transform them into fondant cupcake toppers for your Minion fan.
See Also: Our Despicable Me Cake
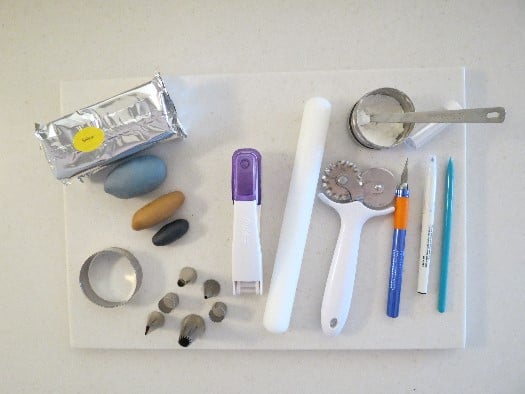
This is what you need:
Work surface
Rolling pin
Corn starch
Rolling cutter
X-acto knife
Fine black edible marker
Circle cutter (I used 2 1/4 inch size)
Small circle cutters for goggles (1 inch, 1/2 inch, 3/8 inch)
Fondant in yellow, purple, white, grey, brown, black
Silver luster dust a soft brush (not pictured)

Step 1: Dust your work surface with corn starch and roll out he yellow fondant.

Step 2: Use the large circle cutter to cut out the minion faces. I also added a few purple circles (not pictured here) to add some fun and variety.
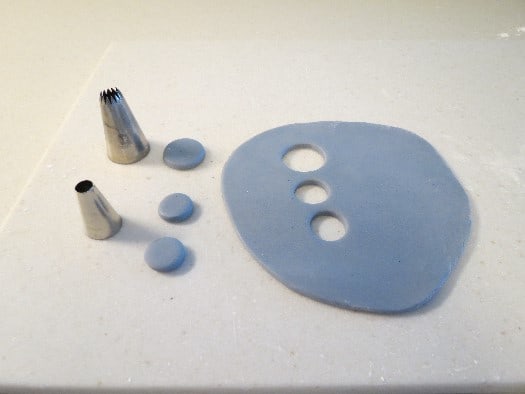
Step 3: Prepare the goggles next. Some Minions have one large eye goggle and some have two small ones. I used a large and a standard piping tip for the outer goggle.

Step 4: It was tricky to find just the right size to cut out the inside of the goggles. A 1/2 inch cutter worked for the large one and the back of a small plunger cutter (3/8 inch) worked for the smaller ones.

Step 5: Here I lined up all of my large and small goggles on the faces to make sure I had enough. But don’t attach them yet!

Step 6: Before attaching the goggles, you have to make them look like sparkly silver by adding edible silver luster dust.

Step 7: Line up the goggles on your work surface and dust them liberally with a soft brush.

Step 8: Roll out a thin piece of white fondant and cut out a background piece for each goggle.

Step 9: Wet the back of the silver goggles lightly and attach the white background to each one.

Step 10: Next cut out the brown iris for each Minion eye. Use trial and error to find the right size cutters for this task. I found a tool that made the perfect size iris for the large and small eyes. (A Wilton circle punch for the small irises and the back of a plunger cutter for the large ones.)

Step 11: Next it is time to make the black pupil of each Minion eye. My Wilton circle punch worked for the large eye pupils and my black marker for the small ones.

Step 12: I added a white reflective accent to the larger Minion eyes with a number 5 piping tip.

Step 13: Line up your sets of small Minion eyes and make a variety of eye positions using your fine black edible marker. This will give your toppers a variety of expressions.

Step 14: One more step for the large Minion eyes. Some of them have hooded lids! Use the 1/2 inch circle cutter to make the lid and then trim a little from the bottom as shown with your rolling cutter.

Step 15: Wet the inside of the hooded lid and gently attach it in place on some of the large Minion eyes.

Step 16: Here are a few examples of the different way to format the large eyes.

Step 17: Dampen the back of the completed eyes with water and attach them to your Minion faces.

Step 18: Cut a thin strip of black fondant for the straps of the large goggles.

Step 19: Trim the straps to size and attach them carefully with water.

Step 20: For the smaller goggles, use the edible black marker to draw them on.

Step 21: Use the black marker to draw on a variety of mouths and hairdos. The purple Minions have a little more detail and texture. To accomplish this look, I cut out white fondant in the teeth shapes and outlined the teeth in black. I also attached groupings of twisted purple fondant hair.

Allow the toppers to dry and harden on a parchment-lined cookie sheet for at least three days before placing them on your cupcakes. The longer they dry out, the better they hold their shape. I hope your Minion fan enjoys them!
Happy Caking!
Renée
Hi friends I want to know how to make corn syrup.
Awesome and super cute. Thank you very much for this tutorial!
These are so dang cute!! Thanks for sharing!
i love this. thanks so much for sharing. this helps me with tips to prepare emoji cupcake toppers….thanks again.