If you have been searching for days to find girl birthday cake ideas how do you know which one to choose?

This girls birthday cake can be transformed for anyone really, depending on the color you choose. You can choose to use blue icing and make a birthday cake for boys or men. There are many different ways you can personalize this cake. This simple two-tiered cake with a chalkboard effect can be used to produce a rustic wedding cake, birthday cake for girls or boys or for any special event.
For any milestone birthday, this cake can be made. But first birthday cakes for girls and boys are important. Using this tutorial, you can produce a cake made with love for their first birthday. If you prefer to make a smaller cake, you don’t have to make a two tiered cake, it can simply be one. This tutorial will give you the steps to make a chalkboard cake by using a simple technique. It is easy enough to make and it won’t take much time either!
Supplies Needed:
- 2 Chilled Layered cakes (I choose to use a 9″ round for the bottom and an 8″ round on top)
- Flat spatula
- Open Star Tip
- Black Icing Coloring to dye the fondant and another color of your choice (I chose pink)
- Ball of Fondant
- Batch of your favorite icing (I used a plain vanilla buttercream)
- 2 New Paintbrushes
- Small bowl of confectioner’s sugar
- 1 bottle of clear extract or flavoring (I used peppermint extract)
Step 1: Start with 2 layered cakes that are iced smoothly and chilled. One for the bottom and one for the top, the bottom cake being slightly bigger than the designated top cake.

Step 2: Get your ball of fondant and put your coloring onto the fondant and knead until coloring is evenly distributed. You might have to add coloring a few times to get that deep black color.
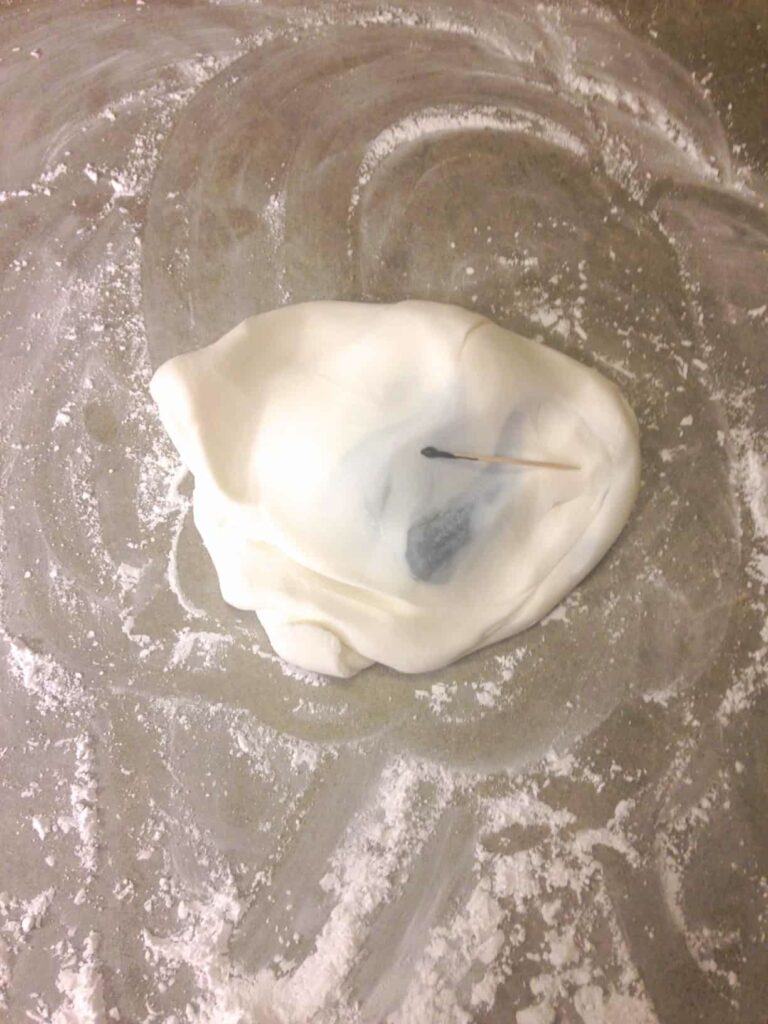
Step 3: Once the fondant is black, roll it out. You might want to use shortening or confectioner’s sugar so the fondant doesn’t stick to the surface. You can roll it out to whatever thickness you’d like.

Step 4: Once you get your fondant to the desired thickness, you will want to take the cake that you wish to have the chalkboard effect (I used the smaller cake to put on the top) and smoothly cover the cake with fondant. Take a flat spatula or cooking utensil and make sure the edges of the fondant are smoothly on the cake.
Step 5: Once you have the black fondant covering the cake, you want to place it on top of the other cake (or vice versa if you chose to give the bottom layer the chalkboard effect).
Step 6: Let’s get the decorating icing ready. Start with a clean bag with the tip at the end and put your icing color on the sides toward the bottom. Add the icing into the bag. This will give your icing a tie-dye effect.
Step 7: Place the fondant covered cake on top of the other cake (or the iced cake on top of the fondant cake) and start icing the rest of the cake.

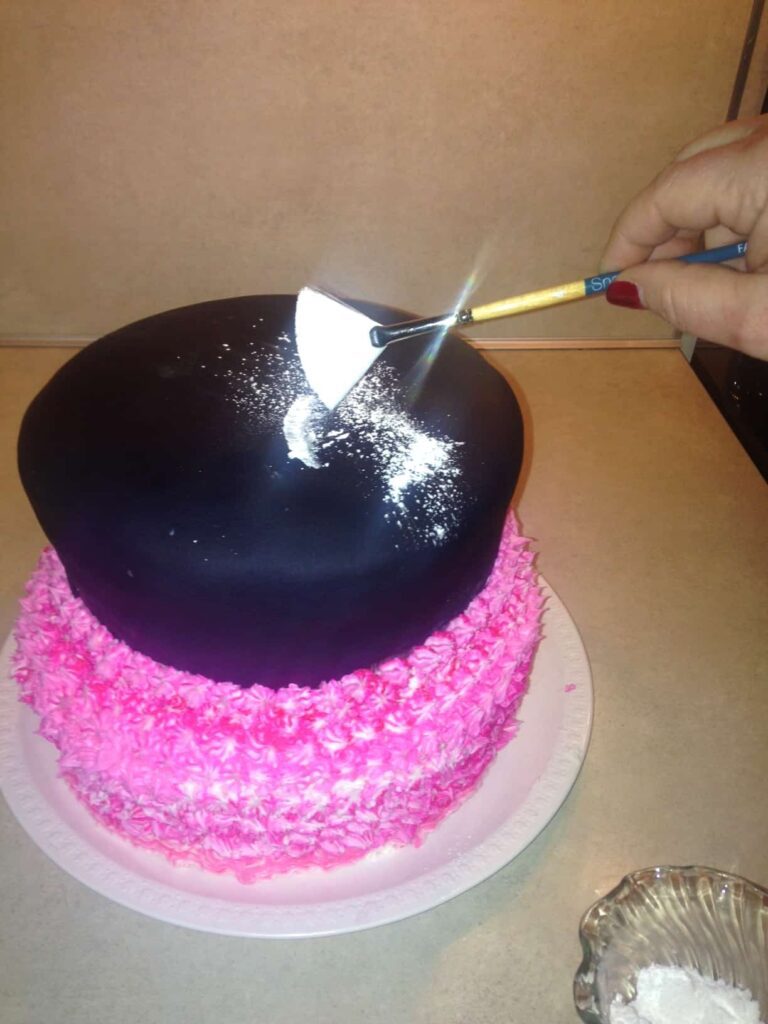
Step 8: Once the rest of the cake is fully iced, we will start to give the cake that chalkboard effect. So get your small bowl of confectioner’s sugar and one of your brushes. I found that a fan brush works well.

Step 9: Dip the brush into the confectioner’s sugar and “paint it onto the black fondant. It will begin to give you that washed out chalkboard effect.

Step 10: If you want to add writing onto the cake, instead of using icing I used a different technique to keep the chalkboard effect. Dip your small brush into the extract, clear spirit, or water. And write your words onto the cake. When the words are still wet, brush them again with the confectioner’s sugar.


Now you have a great cake that looks like a chalkboard! This cake with pink icing makes the perfect little girls birthday cake! Make this for any upcoming birthday party, baby shower, or event.
Enjoy and Happy Caking!
Can’t wait to try this one out.
Thanks for the share.
happy to get cake recipe from here. i tried it. it is totally yummy and mind blowing. Very tasty. Kindly keep sharing more stuff. My sister happy when she looked at cake. Thanks admin.