
Bring on the holiday cheer by dressing up your favorite sugar cookie recipe with little fondant bows. The bow cutter takes the guess work out of dressing these cookies up and buttercream icing keeps them feeling homemade. Sweet little presents for your holiday table.
YOU WILL NEED:
Sugar Cookie Dough
Square Cutter Set
Jumbo Straws
Red Fondant
Hot Pink Fondant
Bow Cutter Set
White Non Pareils
Light Pink, Light Green, Bright Pink and Red Buttercream
Disposable Piping Bags
Shortening
STEP 1: CREATE BOWS
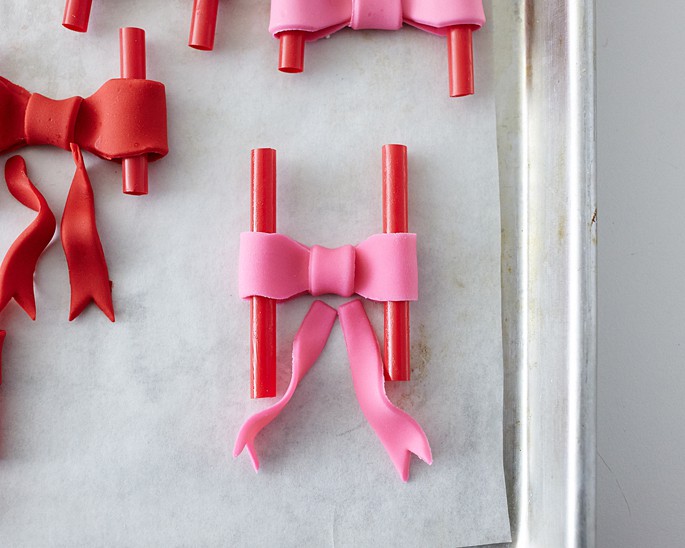
Start by cutting straws into 2 1/2″ or so pieces.

Coat the straws in a light coating of shortening and set them aside.

On a surface coated in powdered sugar, roll out a small portion of fondant to 1/8″ thickness.

Push the bow cutter into the fondant and gently shift back and forth to get a clean cut.
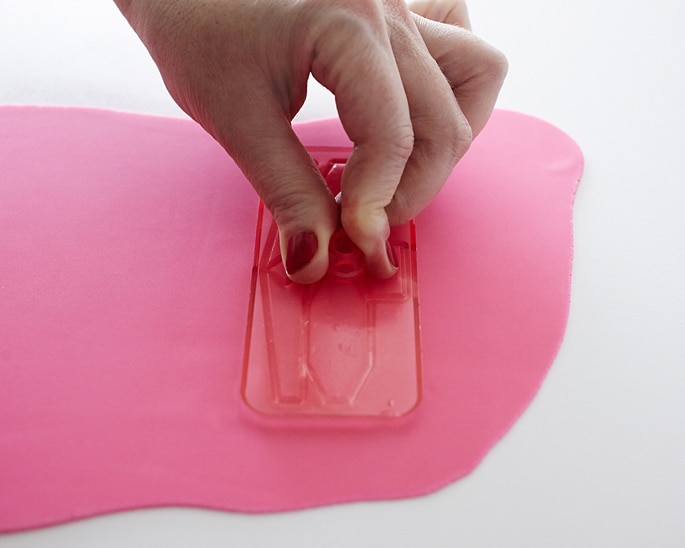
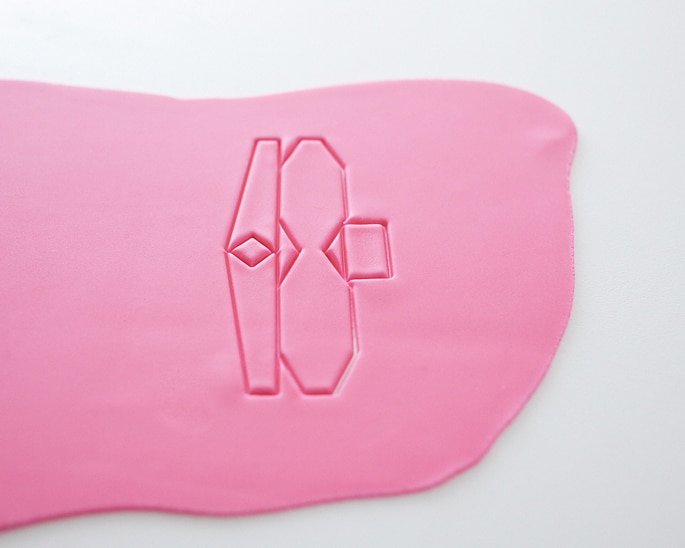
Remove the fondant around the bow and then gently lift the bow pieces to release them from the cutting surface.

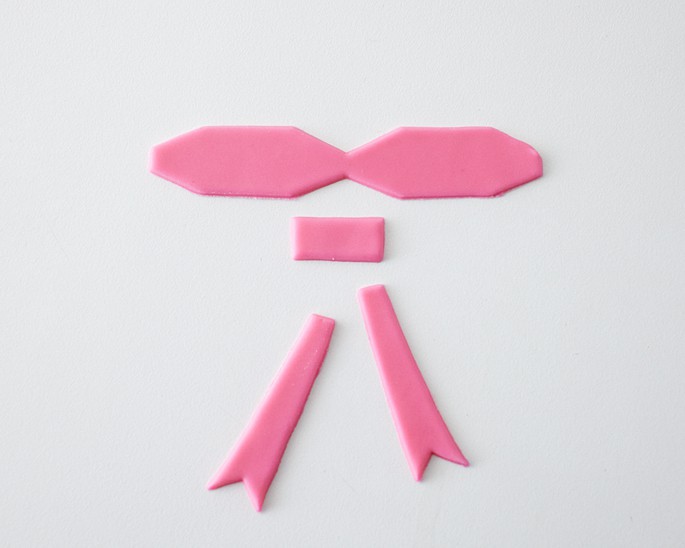
Next, place a straw in the middle of one loop and fold the loop over, adhering the fondant to the center of the bow with a touch of water.
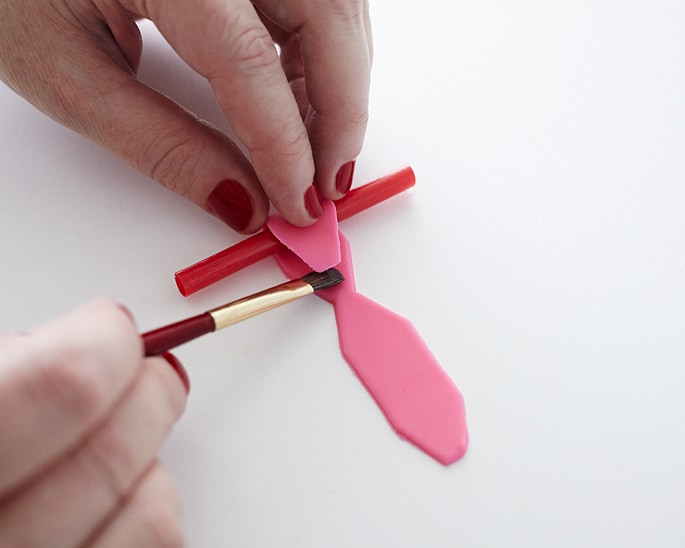
Repeat with the opposite side of the bow.

Attach the rectangle piece of fondant to the center of the bow with a touch of water, and bend the ends of the piece around to the back.

Place the bow on a tray to dry. Place the tails on the tray as well, twisting them to give them some character. Continue making red and hot pink bows for each cookie you plan on baking. Let dry overnight or until they are firm and hold their shape.
STEP 2: DECORATE COOKIES
Roll and bake the cookies, using the square cutter set to cut the cookies out. Once cool, ice the cookies with a spatula in various colors, keeping them as smooth as possible. Some spatula marks are fine.

Place red and bright pink buttercream in disposable piping bags and clip the end to create flat tips. Pipe a criss cross on each cookie.

Sprinkle some of the cookies with non pariels to achieve a “wrapping paper” patterned look.

Once dry, remove the straws from the bows and place a bow on each cookie to match the piping. Use a little dot of buttercream to adhere if necessary.
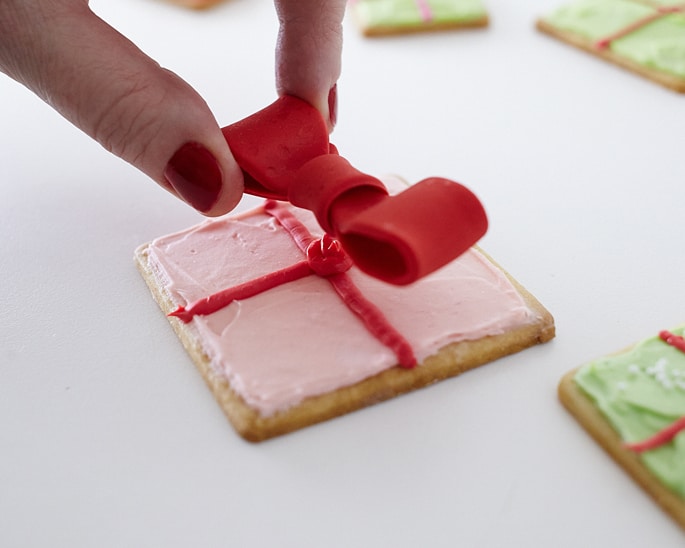
Add the tails in the same manner, trimming to fit as necessary.

Thanks, for this post, now I can use my “bow cutter”
Its been in the drawer for 2 years. This way makes it so easy.
Thanks again