
These poppy cupcake toppers make a big impression due to their size and vibrant color. You can also change the color scheme to make these free-from, modern flowers coordinate with any party.

This is what I used:
Flat work surface
Wilton flower impression mat (optional)
Corn starch
Small rolling pin
Round cutters (2”, 1.5”, 1”)
Ball tool
Water pen
Fondant in red and black
Foam mat

Step 1:
Lightly dust your work surface with corn starch and roll the red fondant thin.
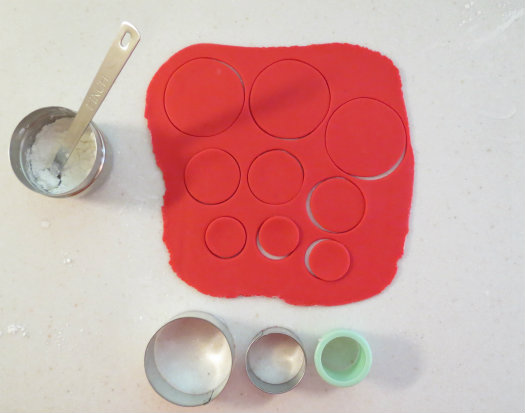
Step 2:
For each poppy, you will need to cut one circle of each size. I was making a set of three poppies, so I cut three circles of each size.

Step 3:
Place the largest fondant circle on the foam mat. Use the large side of your ball tool and slowly press the outer edge of the circle in a clock-wise motion. Go around several times until the edges of the fondant circle curls up.
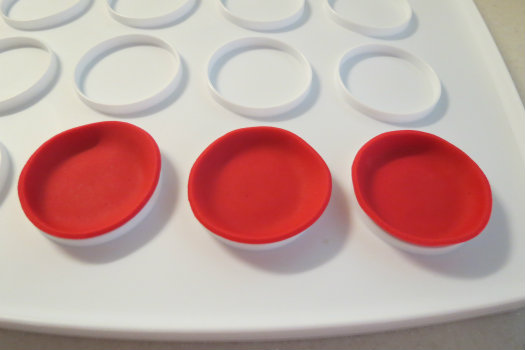
Step 4:
I was lucky to discover a mini cupcake holder was the perfect tray for these toppers as they dry. I placed the large circles there to dry and moved on to the medium circles.

Step 5:
Repeat step 3 with the medium fondant circles.

Step 6:
Lightly wet the center back of the medium circles and attach them to the large circles as shown.

Step 7:
Repeat step 3 with the smallest circles.

Step 8:
Using your water pen, lightly wet the back of the smallest circles and press them in place on top of the medium circles as shown.

Step 9:
I found a mold in my tools called the Wilton Flower Impression Mat, which had a perfect sized center for my poppies. If you don’t have this type of mold, you can easily form the centers by hand. Tip: If you have a button mold, buttons make fun, quirky centers as well!

Step 10:
Form a small ball of black fondant, dust the outside of it lightly with cornstarch and press it level into the mold. This is what it looks like when you pop it out.
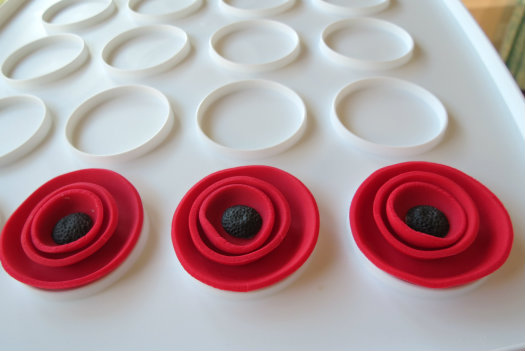
Step 11:
Use water to glue the center into each poppy.
Allow your toppers to harden for at least two or three days so they will hold their shape on your cupcakes. If you are making them farther in advance, simply store on a parchment-lined cookie sheet in a cool, dark place until your baking day.
Happy caking!
Renée
Love the toppers! They are so simple and yet sooooo gorgeous. Loving the potential for different colour combinations. Great tutorial. Will definitely make these. Great tutorial. Mama Bear.
Thanks so much for the kind words. Now that you mention it, they would be nice in a wide array of colors. I’ll have to keep that in mind for my future baking projects 🙂
I love this! going to try it but I was wondering what you would recommend to dry these in if we don’t have the mini cupcake holder?
You could try and nestle them in the bottom of a regular size cupcake pan. I bet the bottom of each spot is about the size of that mini cupcake holder in the tutorial. Or if you have some teacup saucers, you could flip them over and see if they have a similar ring shape on the bottom. The best thing is to look at what you have on hand 🙂
Love the poppy flower – wish i had thougt about making these a few days ago as baking cupcakes tomorrow ready for Friday !! Will know for next year! Cx
lovely, i’ll try this 🙂
Thanks for the nice feedback ladies!
I love the simplicity of these, yet they’re just gorgeous!
What a fantastic idea, and I love the idea of a button in the center.
I love it!!!!!! Thanks