
Today I want to share with you how to make fondant basketweave.
This design is much easier than it looks and comes together very quickly! I decorated the bottom tier of the cake in less than 30 minutes! So, let’s get started.
Here’s what I used:
A prepared cake (baked, filled, frosted and covered in fondant); I used an 8″ round.
Measuring tape and ruler
Large and small rolling pins
Fondant, in the color of your choice; I used brown.
Ribbed or smocking rolling pin (optional)
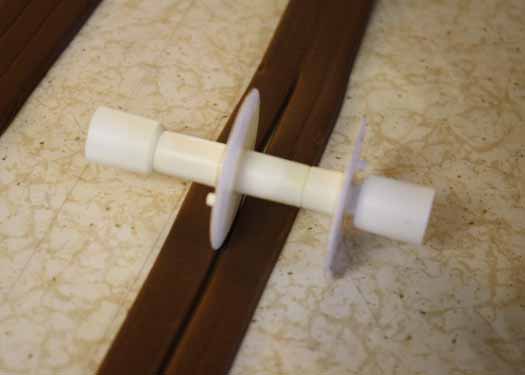
Ribbon Cutter
Pizza wheel
Sugar glue and paint brush
Step 1:
Have your cake prepared, covered in fondant and ready to decorate! For this design, I used an 8″ round cake.

Step 2:
Measure the outside diameter of your prepared cake so you’ll know how long and tall you need to make your panel of basketweave.


Step 3:
Take a large ball of brown fondant (or the color of your choice) and roll it out. I don’t recommend rolling it super thin because you’ll be manipulating it a lot and you don’t want it so thin that it’ll tear or stretch.
You want to roll it out so that it’s long and wide enough to cover your cake. My cake was approximately 26 inches in diameter and 4 inches tall so I made sure my rolled out fondant was at least that size.
Tip: A quilting ruler (the clear/orange ruler you see me using throughout this post) makes a perfect cake tool! You can use them as a guide when cutting strips, ribbons, etc. and use them to easily measure large pieces of fondant. In addition, they wash up very easily!


Step 4:
This step is optional, but I think the extra detail really gives the pattern a more genuine basket-like quality. Use a ribbed or smocking rolling pin to lightly impress lines on the fondant. I used my quilting ruler as a guide to keep me going in a straight line.

Step 5:
Since my basket will be 4″ tall, I decided to do 4 bands, each 1 inch tall. I adjusted my ribbon cutter to a 1 inch width and cut the ribbons. You could also do this with a ruler and pizza wheel.


Step 6:
Trim the strips of fondant to the width and height you need. Leave them in place next to each other! Those you see up top will be used also, but you want to leave the main strips that will go around the cake horizontally in place.

Step 7:
Take one (or more) of the extra strips and cut them in half lengthwise. I did this roughly with my ribbon cutter. They do not need to be perfect.
Once you have long thinner strips, cut them into shorter pieces slightly longer than the height of your basket. Since my cake is 4 inches tall, I cut my pieces around 4.5 inches long. These will be the cross pieces in the basket pattern.

Step 8:
To start weaving the pattern, you’re going to start in the middle and pull back every other long strip of fondant. Fold the strips over on themselves at about the halfway point.

Step 9:
Lay a short, thin strip down at the crease where you have the strips pulled back. Then lay the long folded strips back over the top.

Step 10:
Next, lay back the alternating long strips and lay down a short piece there. Fold them back over.

Step 11:
Repeat these steps until you reach the end. It may seem tedious, but it goes really fast once you get going!


Step 12:
Starting in the middle again, repeat the entire process working out toward the other end.

Step 13:
Once complete, trim both the top and bottom edges so that you have a smooth finish.

Step 14:
Paint a thin coat of sugar glue around all the sides of your cake to prepare to attach the basket pattern.

Step 15:
Using a small rolling pin as the center, roll up the entire panel of basketweave. At this point, my fondant is fairly dry and not at all sticky, so I roll it up without any risk of it sticking to itself. If your fondant is sticky, you may want to lightly brush it with corn starch to prevent it from sticking to itself.

Step 16:
Stand the roll up right and pressing gently, roll it around the cake. With the sugar glue already applied, it should easily stick. Be careful to make sure the bottom of the basketweave stays level with the bottom of the cake.


Step 17:
Trim the ends to fit and make sure to straighten any pieces that have stretched or become distorted in rolling it out.
Step 18:
Roll out a rope of fondant the same length as the basket panel (or diameter of your cake) to cover the top edge.

Step 19:
Using a small amount of sugar glue, attach the rope to the top edge to finish the basket.

Step 20:
It’s difficult to see in this picture, but I also lightly brushed sugar glue all over the surface of the basket and gently press all over. I did this for two reasons. First to make sure all the pieces were adhered to each other and to the underlying cake. Also, I liked the finished look to be a little shiny versus dull.

Here are a few more details about the finished cake:
To finish this tier, I added a banner with the child’s name. I then stacked on a mini second tier covered in polka dots, then a top tier that included a red and white checkered blanket, a tiny cupcake, and a bear I made using Louise’s fondant teddy bear tutorial!
And this is my finished Teddy Bear Picnic cake!
Happy Caking!
Rose
Very lovely! Thanks for sharing.
I imagine if I tried this the whole thing would totally fall to pieces when attaching it to a cake! Do you find its quite secure? 🙂
It was very secure! If it’s done according to this tutorial with fondant that is not too soft, it will hold up beautifully!
Hi,can i do only crumb coat of the cake before sticking on the basketweave
Yes, that should work. Just make sure the crumb coat is fresh (ie., wet) so that the fondant adheres.
Wow that looks so nice. If i may ask how did you do the blanket?
Thanks Andrea! I just posted a tutorial on how to do the blanket here: https://rosebakes.com/how-to-make-a-fondant-checkered-blanket-picnic-tutorial/
thanks, thanks, thanks.I love the tutorials.
Thanks for the wonderful tutorial! I want to try the basket out soo much. Might have to do a just for fun cake!! I just have one question: I make the fondant using your recipe and love it! The only problem i noticed with it when i make it, is if it sits out the refrigerator for too long it gets sticky. I can leave the cake on the table for 10 minutes and it looks like its sweating and gets sticky. I want to be able to leave the cake out for parties sometimes, but not if its doing this. Any help will be appreciated!
Catherine – do you use my recipe (I’m Rose – that wrote this post) or Louise’s recipe? For my marshmallow fondant, I never refrigerate it or my cakes once they’re covered and I don’t have any problems. If you refrigerate a cake covered in fondant, it will sweat once put at room temperature. The only solution is to let it air dry or put it in front of a fan, but I recommend just not refrigerating.
Thanks for a great tutorial!Very nice cake decoration!!!
hugs
It’s beautiful! I loved your tutorial and explanation you do. I hope to enjoy more post, since their work has interested me much.
A greeting and thank you very much for sharing your art.
Amazing. I LOVE the tutorial – you make it seem like even I could do it!