Sweet trees are a great gift or table top treat for parties and weddings. They can be colour coordinated to match any theme and can literally use any sweet treat you like making them very versatile.

What you will need:
Wooden dowel (7/8″ x 36″)
Small saw (for cutting dowel)
Small flower pot or vase
6 cm Styrofoam ball
Pastry brush
Glue gun (not pictured) or glue
Selection of sweets (your own choice). Marshmallows, Flying Saucers, Liquorice Allsorts, Toffifee all work well
Wilton Candy Melts
SK Modelling Chocolate Cocoform
Modelling paste
Small piping bags
Selection of ribbons
Step 1:
Begin by selecting a pot. Small pots such as these can be purchased at Hobbycraft in the UK, or garden centers and cost very little.

Step 2:
Carefully cut your dowel to (approx) 10″ long.

Step 3:
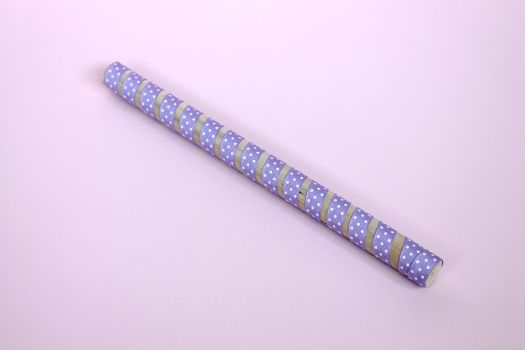
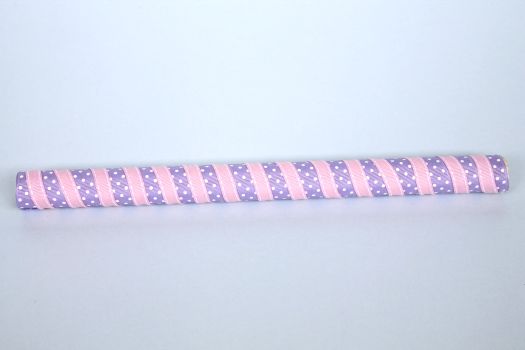
Taking a piece of ribbon (in the colour of your choice), wrap it around the dowel horizontally, securing both the ends of the ribbon with a dab of glue to prevent it unraveling. I then used a thinner ribbon in a contrasting colour to wrap in between the first ribbon, securing the ends with glue in the same manner.


Step 4:
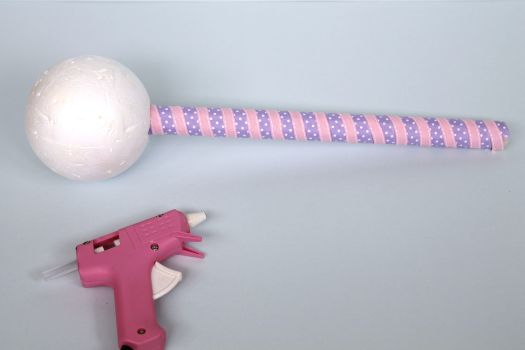
Using the undecorated (remaining dowel), create an indent of about 1.5 cm deep into the Styrofoam ball by pushing firmly in the middle. (Make sure that it is central as otherwise your tree will not stand straight).

Step 5:
Using your glue gun (or melted chocolate), stick your decorated dowel into the indent of the styrofoam ball, holding firmly in place for a minute to secure.

Step 6:
Take your cocoform and fill half the pot with it and push the dowel firmly into the pot. The cocoa form sets harder than regular fondant and secures the dowel. (I then used a little modelling paste (tinted pink) and put a thin layer on top and pushed around the dowel to hide the cocoa form and make it pretty, but this step is not necessary as the cocoa form adequately secures the dowel). Leave to set overnight.

Step 7:
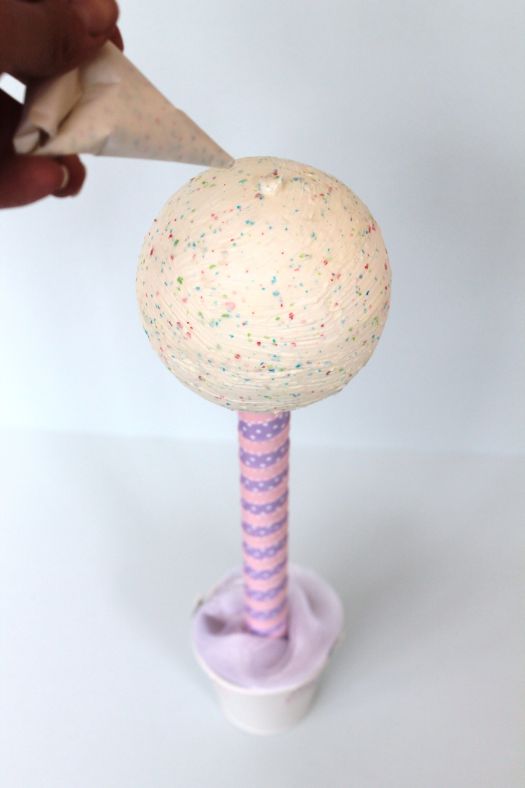
Place candy melts into a heatproof bowl (you can use any colour melts to suit your theme) and melt in your microwave as per the manufacturing instructions on the pack. Once melted, take your pastry brush and paint the Styrofoam ball in candy melts until completely covered.


Step 8:
Fill a piping bag with a little chocolate and pipe a dot into the top centre and add your first sweet (in my case a marshmallow, but the same principal applies whichever sweet you are using). Press gently for a moment until the sweet sticks without sliding off.

*TIP. If you have difficulty making paper piping bags you may prefer to use plastic ones as the chocolate hardens quickly, and so you may need to use two or more bags to complete one sweet tree. Plastic bags can be warmed on a defrost heat in the microwave for a few seconds until softened.
Carry on adding sweets in a circular motion in layers until you reach the very bottom of the Styrofoam ball. Make sure you get right underneath and to the dowel.


Step 9:
Finish off your sweet tree as you like, by adding bows, embellishments etc.

I hope you have enjoyed this tutorial. Have fun creating your own trees!
Happy Caking!
Gillian

Just what I was looking for, thanks for putting up.
Hi I’m getting married soon and planning on doing sweet tree’s as my centre pieces instead of favours. But I don’t want to use marshmallows I want to use the chocolate hearts covered in foil. Will icing sugar or chocolate still work with those? I’m buying sweet tree kits off a website and I have like 12 to make so do u have any advice? Thank you 🙂
Hi, how many styrofoam balls will one pack of candy melts cover, as I’m making up trees with 15″ balls
Could you use a cake pop so that you can pick it up and eat it?
I absolutely love your sweet tree. I’ve started to make my own for my wedding, but I can’t buy the styrofoam balls or marshmallows here so I’m having someone bring them over for me. I was just wondering approximately how many marshmallows are needed for a 6cm ball?
Thanks
Why? You can’t eat it! Seems wasteful 🙁
HI Marilyn. Yes you can eat them! They are wonderful, because you attach the sweets to the polystyrene with chocolate or royal icing. Perfect as a gift or on the table if you have guests. Then the sweets can be picked off and eaten like a tree. I recently made money trees (with chocolate silver money stuck on them) for a wedding that were placed on each table. They were a huge hit. x
Could you also stick the sweets, like marshmallows into the styrofoam with a tootpick?
you could but it would be very time consuming and fiddly. Chocolate or royal icing is easier.
wow this is so gorgeous!
So sweet!!
This is an awesome idea Gill! And they would make beautiful centerpieces at parties 😀
Hi
Just wondering if the sweet tree is edible
thanks
Margaret
Only the sweets stuck on are edible, though you could use a stick of rock for the tree trunk. I have seen these used to great effect.
Love this!