
My niece was turning 11 recently and I asked her what she wanted for her special dessert. She requested Emoji cupcakes! I did a little research and discovered that Emoji faces would transform into perfect fondant cupcake toppers! Since sharing these toppers on Pinterest, they have been pinned dozens of times. I realized that these would make a useful tutorial!

This is what you need:
Work surface
Corn starch
Rolling pin
Fondant in yellow, pink, brown, white, blue
Medium circle cutter
Small circle cutter
Rolling cutter
Pink petal dust and small brush
Large heart shaped sprinkles
Tiny circle cutter
Clear vodka (not pictured)
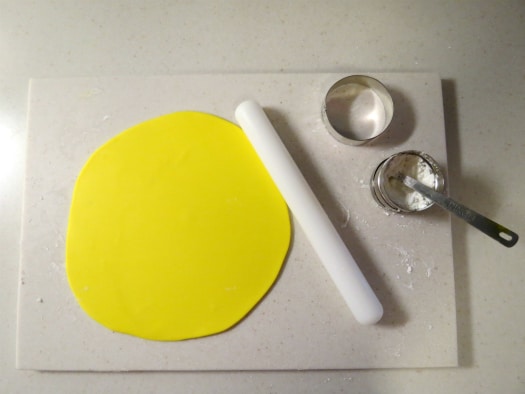
Step 1: Dust the work surface with corn starch and roll out the yellow fondant to 1/8 inch thin.

Step 2: Use the larger circle cutter to cut out your desired number of toppers.
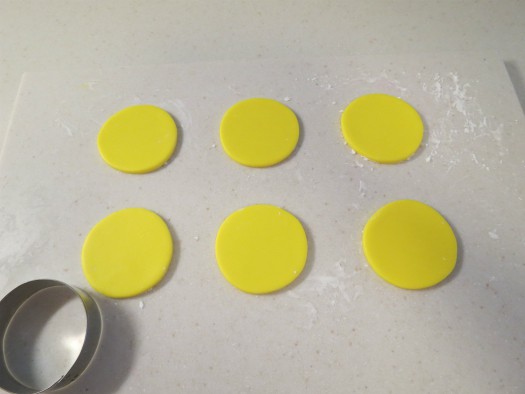
Step 3: Remove the excess fondant from your circles and smooth their edges with your fingers.

Step 4: You essentially “build” these Emoji toppers by layering the elements of the faces you choose to make. Several of the faces that I chose for this tutorial have brown mouths. Here I rolled out my brown fondant nice and thin.
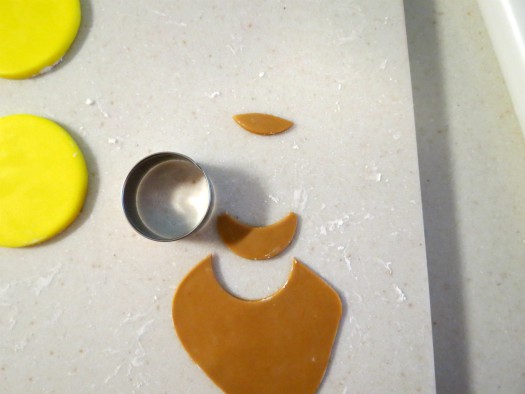
Using your smaller circle cutter, cut out the shape of the mouths you need.

Use your rolling cutter to refine the shape of each mouth until you are pleased with it.

Dampen the back of each mouth with water and place it on the Emoji face.
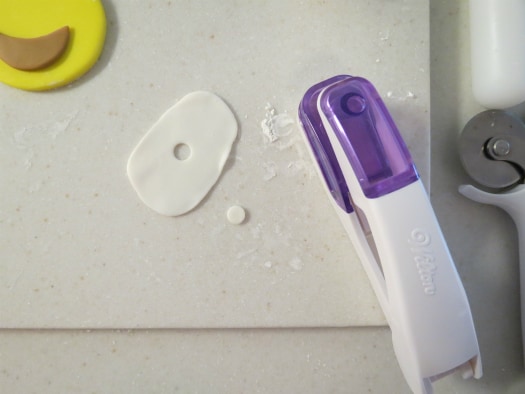
Step 5: I next rolled out a thin piece of white fondant to cut out any white shapes that need to be layered on my Emojis. I used my circle punch to make one round eye.

I also needed to cut out some teeth from the white fondant. The same method was used with the small circle cutter to create the white teeth shapes.

To attach the white shapes, dampen the backs with water and gently attach them in place. *Tip* It is important to allow the toppers to dry and harden for at least 3 hours before proceeding to the next step.

Step 6: Use the extra fine black edible marker to outline the mouths and teeth and eyes..
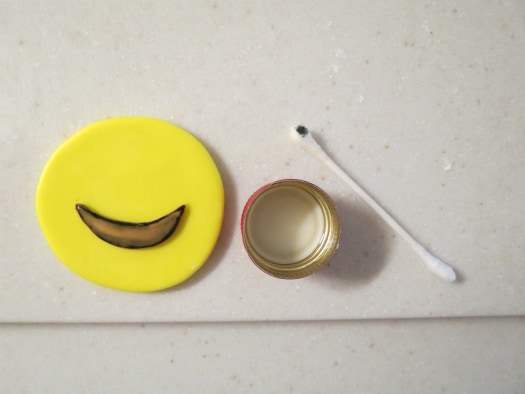
Some of the face designs I chose had slight shading of the mouth, To achieve this look, dampen a q-tip with clear vodka and shade the marker outline.

Some of the other designs I chose did not require shading, so I simple did a thin outline of the mouth and teeth.

Carefully outline any round white eyes on your Emoji faces.

Step 7: Use the black marker to fill in any one-dimensional black details such as mouths, eyes and eyebrows. The faces are starting to take shape!

Step 8: Prepare any final three-dimensional details that will need to be attached after blushing the faces. For the ones I chose, I needed 2 tear drops, 2 heart sprinkles, and a tongue. I used my circle punch to make two tiny circles for tear drops.

Use your fingers to make one end of the tear drops pointy. Test the size and shape against he Emoji face but do not attach them yet.

The last detail I needed was a small tongue. Hand shape it and use a toothpick to create the crease.

Step 9: Before attaching the final details, use a small brush and pink petal dust to add blush to the cheeks of the Emoji toppers.

After blush has been added, you can attach the final details. For my characters, that as the tear drops, tongue, and large heart sprinkles. Place them on a parchment-lined cookie sheet and allow them to harden in a cool, dry place for several days. Place them on you cupcakes and enjoy!
Happy Caking!
Renée
Renee!!! These are SO stinkin’ cute!!