
It’s summer in my neck of the woods, and that means swimming, swimming, swimming! My kids swim almost every single day, whether it’s at our local lake, pools, day camp, or their grandparent’s house at the Jersey Shore. So I thought a fitting treat this month would be mermaid tail cupcake toppers. They will be a hit at any pool or beach party you attend!
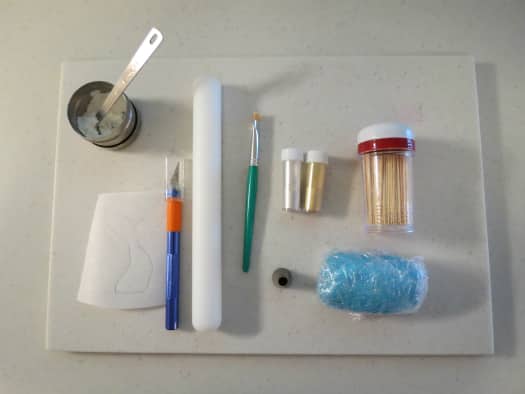
This is what I used:
Work surface
Corn starch
Blue fondant
Rolling pin
X-acto knife
Wilton piping tip #12
Tooth picks
Silver or gold edible dust
Small brush
Parchment paper
Not pictured, gum paste

Step 1: Draw any shape mermaid tail that you like on a piece of parchment paper and cut it out. This will be your template. If you are not good at drawing, print one that you like and trace it through the parchment paper.

Step 2: Knead a small amount of white gumpaste into your blue fondant to make it dry faster and stronger. Roll out a thick piece of fondant and lay the parchment paper template on it. It will not stick. Dip your X-acto knife in corn starch each time you make a cut around the template. This helps it glide nicely.

Step 3: Cut carefully all the way around your template. If any of the edges are rough, smooth them out with your fingers.

Step 4: Take the Wilton #12 tip or any similar round piping tip you have. Make scale impressions starting at the bottom of the tail and working your way up to the fin.

Step 5: You can see in this photo what the base of the tail looks like after you make the scale impressions with the round tip.
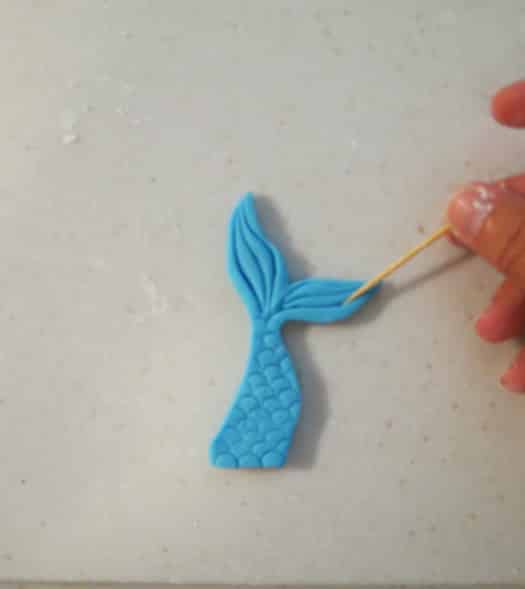
Step 6: Use a tooth pick to firmly trace lines into the fin of the tail as shown.

Step 7: Apply silver or gold edible dust with a small brush to make the tail shiny.

Step 8: Insert three toothpicks into the base of the tail. Insert them deeply for strong support. You can cut the bottoms to your desired length with a wire cutter or strong shears. If the scales get worn out during this process, go over them again with the round piping tip.

Step 9: Lay the toppers on a parchment-lined cookie sheet. I used dowels to shape the fins as they dried.
Allow your mermaid tails to harden for at least three days in a cool, dry place. Insert them into home made or store bought cupcakes and enjoy!
Happy Caking!
Renée
Just love these! Have just finished making them for a mermaid party for my girls which is in three days time. Thanks for the great instructions and pictures, it really was fun and easy to make! I did find it easier to insert the already cut toothpicks into the fondant form before decorating. And I found it easier to start with making stripes on the tails first and then to make the round impressions last. But it has worked out beautifully! Hope it dries before the weekend!
Renee thats so beatiful