• Skip to primary navigation
  • Skip to main content
  • Skip to primary sidebar

Cake Journal

  • Cake Lounge
    • Easy Embossed Cookies Recipe
    • How to Make Heart-Shaped Cake with Buttercream Roses
  • Desserts
    • Best 3 Cookie Scoop Sizes and How to Use Them?
    • Babycakes Cake Pop Maker Review and Tutorial
  • Recipes
    • Traditional Castella Cake Recipe
    • Stabilized Whipped Cream Frosting (Easy Recipe)
    • Best Frozen-Themed Cake Ideas with Images
  • Tips & tools
    • What to Do With Cake Scraps? (8 Easy Recipes)
    • Luster Dust: If You Don’t Know About It, You Need To!
    • How To Use Edible Glue and How to Make It
    • How to Use Russian Piping Tips and Tutorial
    • What Is Wafer Paper and How to Use It? (Video Tutorials)
  • Tutorials
    • How To Make Royal Icing (Easy Recipe)
    • How to Flood Cookies with Royal Icing?
    • How To Use Candy Molds Properly
    • How to Make Cake Pops: Easy Step-by-Step Tutorial
    • Fondant On Cookies: Easy Way To Decorate
  • About Us
  • Contact

How To Make Sugar Mold Cupcake Toppers

January 22, 2015 by Louise 3 Comments

_MG_7200

This is a super easy technique to create sugar mold cupcake toppers that would work in any color and with a huge variety of molds. Because mini lips are so hard to resist, we decided to make these sugary little accents for mini Valentine’s Day cupcakes but could have easily made a top for any occasion. A chocolate mold with small cavities works best, so that your finished sugar molds aren’t too heavy and don’t easily break. Make sure your sugar is damp and moist, but not soggy for the best results.

You Will Need:

4 oz. Container of Sanding sugar ( 1/2 cup)

Water

Chocolate Mold with Small Cavities


Start by placing your sanding sugar in the bowl of a food processor. Pulse until it’s more finely ground like granulated sugar, 10 long pulses or so.

_MG_6788 _MG_6808

Place the sugar in a bowl and add 1/2 tsp of water. Stir thoroughly until the sugar is uniformly moist. Press your finger into the mixture to see if it holds an impression. If necessary, add a few more droplets of water to moisten.

_MG_6831 _MG_6869

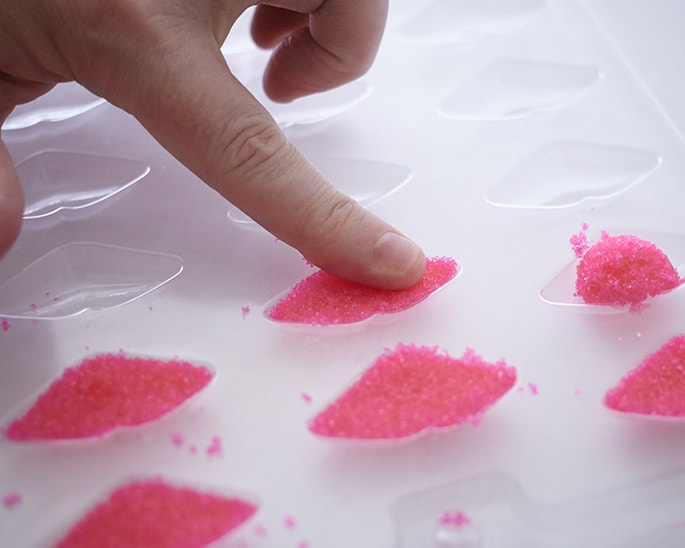
Fill the cavities of your mold with an ample amount of sugar. Then, use your finger to firmly press the sugar into the mold.

_MG_6881 _MG_6889

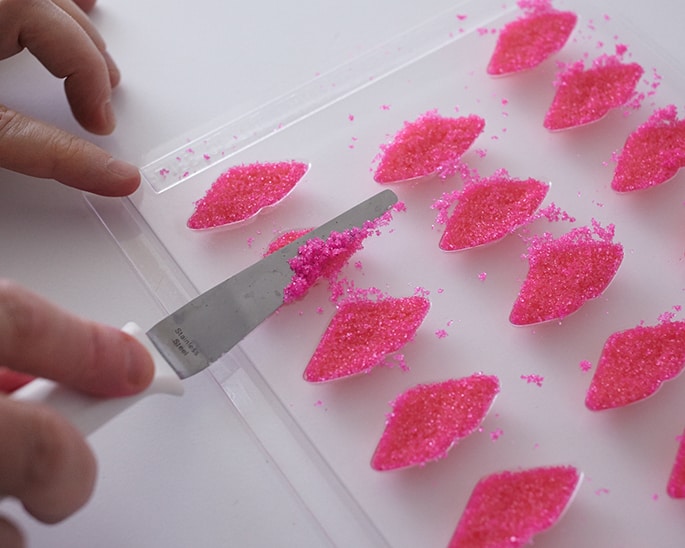
Next, use a spatula to skim off any excess sugar so that your molds are evenly filled.

_MG_6908

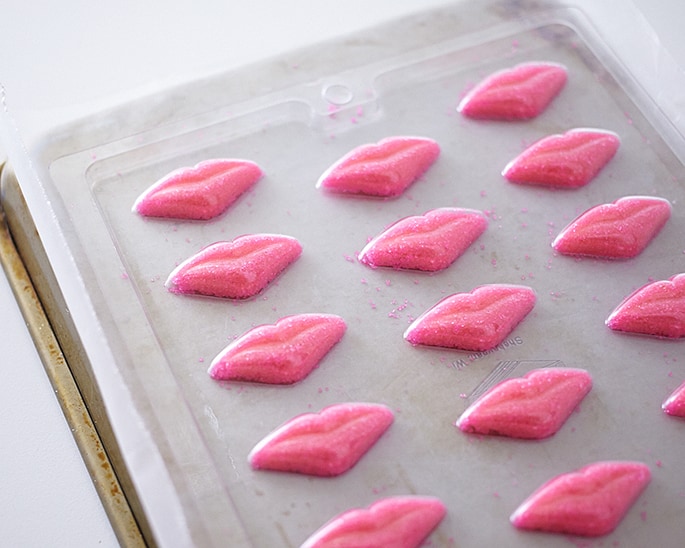
Place a piece of wax paper over the mold. Then, place the bottom of a sheet tray on top. Grasp all three layers and flip the mold over, keeping it in place.

_MG_6944

_MG_6948

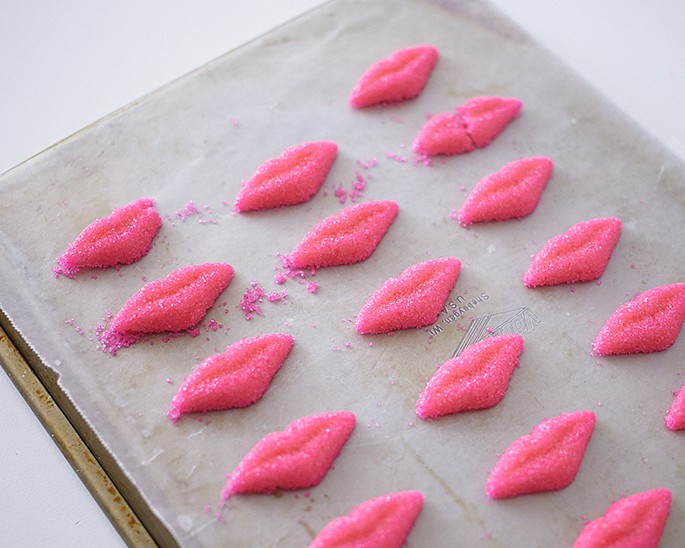
Gently remove the mold and lightly tap on any cavities that haven’t released. Some of the sugar molds may break, but don’t sweat it, just scoop up the broken sugar and place it back into your bowl.

Repeat this process with any remaining sugar, but be sure to wipe out your chocolate mold with a dry paper towel before starting on your second batch.

_MG_6932

Let the molds dry for minimum of 5 hours or as long as necessary until they are thoroughly dry. Store in an airtight container.

_MG_7200

Previous Post: « How to Make an Upside Down Pineapple Cake
Next Post: How To Make A Realistic Heart Box of Candy »

Reader Interactions

Comments

  1. Donna Reid

    May 5, 2018 at 12:50 PM

    I am going to try this making unicorn horns,ears,ect any suggestions on how to glue the half horns together to make 3-D

    Reply
  2. Michelle

    January 26, 2015 at 4:30 AM

    Lovely cupcake! So girly as well! We’ll try it my daughter, I’m sure she’ll enjoy doing this! Thank you!

    Reply
  3. Madame Baker

    January 23, 2015 at 1:28 AM

    These are too cute! I’ll have to try them.

    Reply

Leave a Reply Cancel reply

Your email address will not be published. Required fields are marked *

This site uses Akismet to reduce spam. Learn how your comment data is processed.

Primary Sidebar

Search Recipes on Cake Journal:

About Us

Kristen is the author of Cake Journal and a graduate of the Professional Baking program at Renton Technical College. She has worked as a pastry chef at a top Seattle restaurant and loves sharing her passion for baking amazing cakes on this site.

Contact Me

Privacy Policy

As Seen On:

Follow Us on Pinterest

Copyright © 2023 · Cake Journal