Two days ahead, bake your cake layers and make your buttercream (unless you prefer to make it the day of). Wrap the baked layers in two layers of plastic wrap and place in the fridge. Store you buttercream covered in plastic wrap as well.
Next, melt some dark chocolate candy coating in the microwave on half power, stirring every 30 seconds or so, until melted. Fill the cavities of your mold and then tap the mold heavily on the counter to break any air bubbles. Place the mold in the freezer for 10 minutes and then remove and pop the chocolates out. Do this twice because you will need two sides of each mold. Let them come to room temperature and attach them, using a dab of chocolate to adhere.
Decorate the heart chocolates by placing a dab of melted coating on the top and attaching a heart sprinkle.
Decorate the square chocolates by dabbing the top in melted coating and then sprinkling in hot pink non pareils.
Decorate the rectangles by rolling out tiny ropes of white fondant with your fingers and using a light coating of water on the back of the rope to attach it to the top of the candy.
Set these aside in a cool, dry place, covered if necessary.
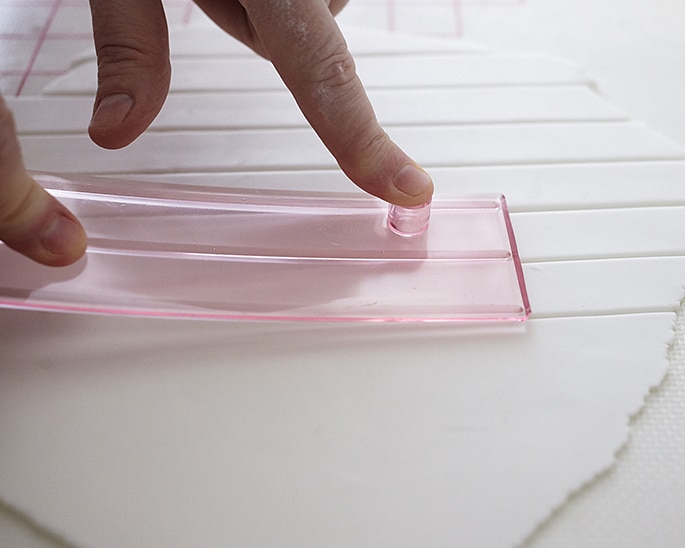
Create your bow loops by rolling out some white fondant about 1/8″ thick. Use a strip cutter or a cut along the edge of a ruler to create strips. Next, cut a strip into 4″ segments. Fold the segment in half and attach the cut ends with a dab of water. Pinch the cut end with your fingers to create a taper and then place the loop sideways on a parchment covered tray to dry. Make 16 bow loops. (This is more than you need but it’s always good to have extra in case of breakage).
THE DAY OF: Ice cake layers, cover with fondant, create bow, finish decoration.
Trace the bottom of your pan on the cake cardboard and cut out. You will only need on of these to support the box “lid”. The other layer will be decorated on a platter or display board.
Prepare your buttercream by rewhipping or making from scratch. Pull your cakes from the fridge.
Ice your layers in buttercream, placing one on the heart shaped board and the other on a platter or display board. Place your layers in the freezer while you roll out your red fondant.
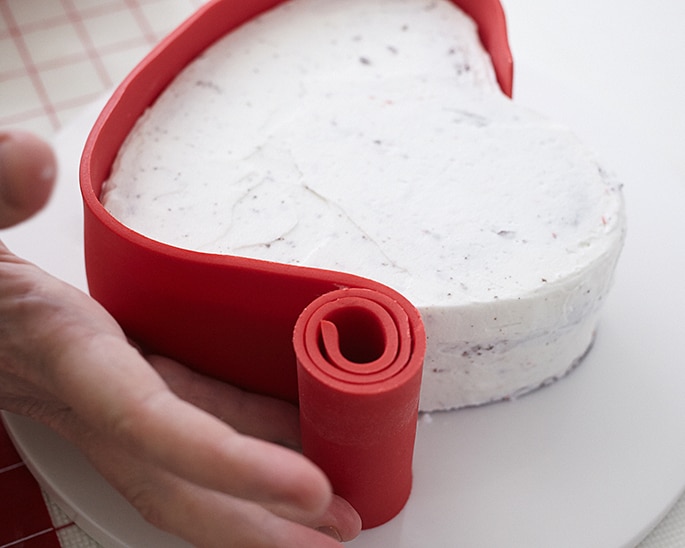
Roll out some red fondant about 1/4″ inch thick. Measure the height of the side of your iced cake on the cardboard (your lid) and cut a strip the same width as the cake. Roll the strip up and then unroll it around the side of the cake.
Then, do the same for the layer that is on the platter (your box), but add 3/4″ to the width of the strip so that when you unroll it around the side of the cake, it is higher than the layer.
Roll out some additional red fondant. Using the bottom of the heart pan as a guide, cut around the pan leaving a 3/4″ gap. (Use the fluted wheel to cut through the fondant). Switch your tool to the stitched wheel and gently add a stitched texture inside the edge of the heart. Lift and place the heart piece on top of your box lid layer. If necessary, stretch and pull it into place in order to make sure it hangs over the edge a little bit.
Roll out some hot pink fondant and cut a smaller heart to fit inside the lid. (Freehand this, or use a paper template if necessary). Use your stitching wheel make angled lines, then do the reverse angle to create a quilted texture. Attach it to the top of the lid using a little water to adhere. Then switch to the standard wheel and create a ridge around the edge to make it look finished.
Place this layer in the fridge while you move on to the next layer.
Roll out some additional hot pink fondant and use the bottom of the pan to cut out a heart shape (do not make it bigger than the pan this time). Lift and place it inside the other layer, which is the box layer. Shift or stretch it a bit to make it fit exactly.
Then, melt some additional candy coating and attach the chocolates in side of this layer.
Now it’s time to work on the bow. Take a golf ball sized portion of white fondant and run it very quickly under water. Knead it together until the fondant is tacky (it should not be slippery, just sticky, so add a little fondant back in if necessary to adjust it). Remove 1/3 and set it aside. Place the remaining 2/3 on the pink heart, making sure it’s inset from the edge.
Blend the bottom of the lump onto the cake a little bit with your finger to make sure it’s adhered. Then, dip the tapered end of each bow loop in water and insert it into the sticky fondant to create the first layer of the bow (I used 6 bow loops). Mash the fondant over the ends of the bow loops to keep them in place.
Finish the bow by arranging additional bow loops layered with wads of sticky fondant to keep them in place. (Use the remaining 1/3 sticky fondant as necessary). Once you’re bow is finished, use the back of a paintbrush to tuck in any fondant that’s squeezing out to make the bow look nice and neat.
Mix some gold luster dust with a few drops of clear extract until you have a paintable consistency. Paint the edge of the pink heart, the edge of the candy box lid and the edge of the candy box.
Prop the lid layer on the edge of the platter of the candy box and scatter any extra chocolates around to finish.
Happy caking!


This looks perfect – I am soooo excited!!
Your recipe will be my first themed cake ever as well as my second home made cake in all my life (the first one was a pretty good success).
I can’t wait for valentines day and my sweetheart’s reaction, fingers crossed it goes well 🙂
Thank you for sharing this xx
The cake is beautiful and the instruction simply to follow. Thank you for allways sharing.
Blessings.
This is amazing! Thank you for sharing you designs and instructions,keep up the good work and keep sharing!!!
Love, love, love this!! Thank so much for the tutorials that you share and the details you share are fabulous!!!