
These adorable little roses are just cake pops in disguise. Dressed up in a thin layer of fondant and dusted with shimmer, they’re an easy and impressive treat. So, go ahead and wow your sweetie with a flower bouquet and dessert all wrapped up in one.
YOU WILL NEED:
Cake Pop Filling (note: make sure the filling is not too squishy and will hold it’s shape)
Hot Pink Fondant
White Candy Coating
Sucker Sticks
Jem Easy Rose Cutter 110mm
Tulip Red Luster Dust
Paintbrush
For The Buds:
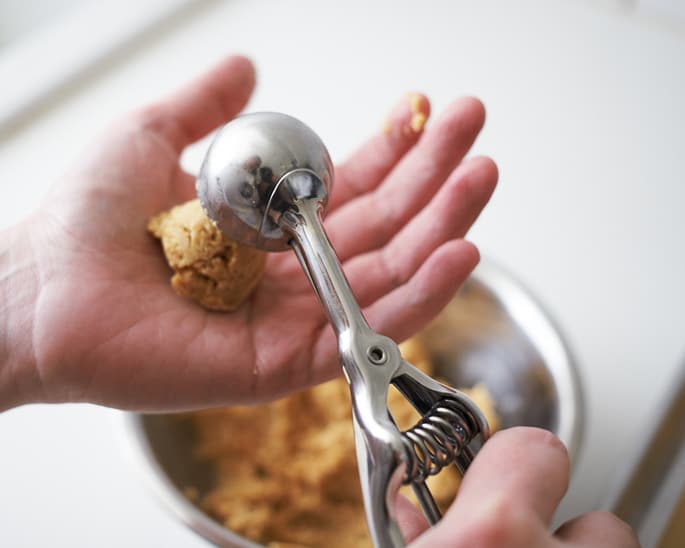
Scoop one even tablespoon of filling into your hand. Roll into a ball and then use your fingers to shape the filling into a bud or tear drop shape. Place the bud on a tray and continue with the remaining filling. Once your buds are done, place them in the fridge until very firm, 30 minutes to 1 hour.

Once the buds are firm, place some candy coating in a microwave safe container and heat on half power for 30 seconds at a time, stirring in between, until melted.

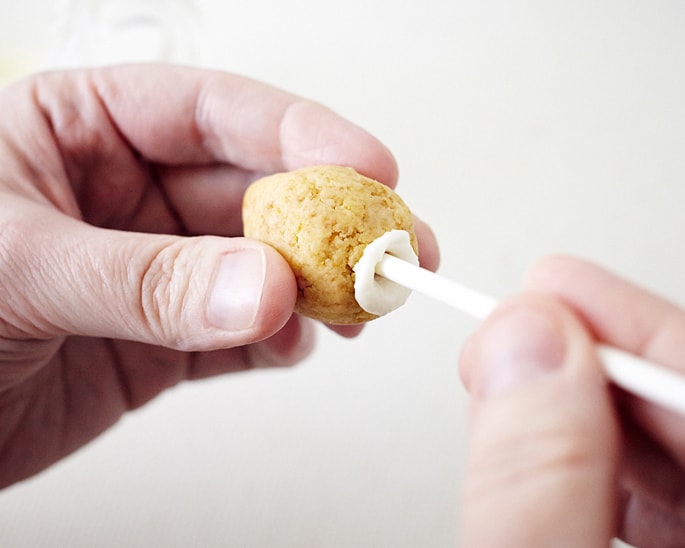
Remove one bud from the fridge. Use a sucker stick to poke a hole half way up, remove the stick, dip the end in coating and then reinsert into the bud to adhere. Wipe away any drips of coating as necessary.
Place the finished bud back in the fridge and continue with the remaining buds, one at a time, until finished. Keep all the buds in the fridge.

For the Rose:
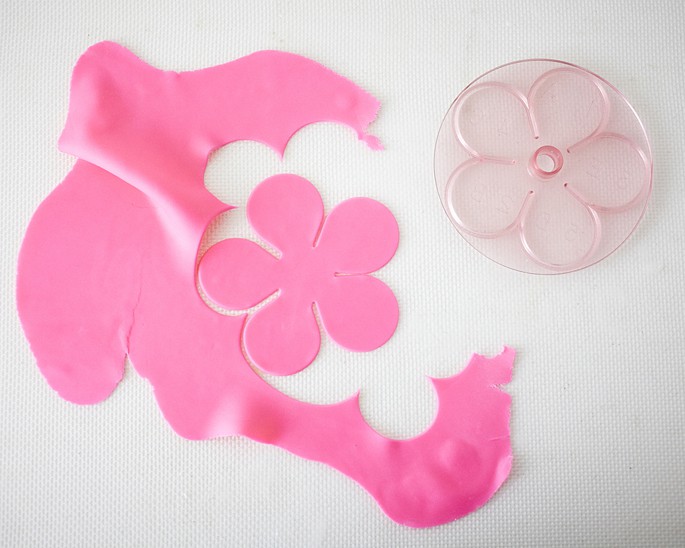
On a surface coated lightly with powdered sugar, roll out a small portion of fondant as thinly as possible. Use the rose cutter to cut out a flower shape.

Next, place the fondant flower in your palm with the center resting at the opening of your fingers. Brush a light coating of water in the center of the flower and insert one of the buds through.

(The rose cutter is numbered which will help you know what order to go in). Lift and stretch petal #1 up and around the teardrop.

Repeat the process with petal #2, making sure it cups and intertwines with petal #1 to cover the cake pop bud. Brush with a little water in spots to adhere as necessary.

Repeat the process again with petal #3, #4 and #5. Make sure to place these petal evenly around the outside of the bud, using a little water to adhere in places as necessary.
When the petals are finished, use your fingers to curl and flair the edge of the petals for effect.


Place the rose in a glass to dry. Once dry, use a brush to heavily coat the crevices of the rose with luster dust and then shake or brush off the excess. Finish the remaining roses by rolling a little fondant at a time and working with one bud at a time.

Thanks so much for the directions! I am making these for a 70th wedding anniversary. I made buds and dipped in melted chocolate. How would I adhere the fondant to the cakepop?
What a great idea, I have 70 cake pops to make for a wonderful lady I know to help celebrate her birthday, and by making these part of the 70 cake pops it will add a note of sofistication among the the Art Decco colours of the other cake pops. BRILLIANT, JUST BRILLIANT.
Thank you sooooo much
Kim xxxx
So glad that you like this project! Sounds like a perfect fit for a 70th birthday party!
This is way too cute. Have only done cake pops once in my life and know a little about this rose cutter as I’ve tried this simple rosebud…. I have a few questions:
1. Does one coat the bud entirely in chocolate prior to appling the fondant?
2. How far in advance can one make the final rosebud (covered in fondant)? Thing along the line of preparing a ‘few’ gifts
To answer your questions, you don’t need to cover the bud entirely in chocolate. I found that it made the whole thing too heavy and I was worried that it might fall off the stick. We kept our roses for over a week (in the fridge, but it’s not too humid where we’re at so the fridge isn’t wet) and they were still moist. It’s important to cover the base completely with the fondant when making the roses so that you don’t have tons of gaps that can dry out the filling. Hope this helps!
Awesome!!! Thanks for replying. I do live in a high humidity area (Puerto Rico). Still, i will definitely test it out. I love this idea. Looking forward to seeing future posts!!!
Do you cook the cake batter at some point after making the buds? Or, is it cooked before? Or, does it just stay raw?
Thanks!
Thanks for the question! The list of ingredients calls for “cake pop filling”. Cake pop filling is a mixture of BAKED, crumbled cake crumbs and a little buttercream to hold it together. (There are tons of recipes available online for this) You need to have this mixture ready before starting and then once you have your rose finished, there’s no need to bake anything again
These are exactly what I wanted to present for valentines. Thank you so much x
I’m so glad that you like this project! To answer some questions, yes, you could definitely use modeling chocolate. However, you just couldn’t roll it as thinly, so they may look less delicate, but still cute. Almond paste would work too. My sister and I did eat one of these afterwards and with the fondant we use (Fondarific), rolled thinly, they were delish! (We’re not always partial to fondant ourselves.)
Love these. I would use colored almond paste though. Don’t like the taste of fondant.
Thank you for the pictured tutorial. Love this sight.
Oh these would be perfect for a baby shower! Such a differently striking yet simple take on cake pops. These might just be the ones to finally get me to try making some! Thank you. I suppose modeling chocolate would work just as well (better taste)?
These are awesome. Thanks for sharing. I hope to make these for valentine.