
These adorable baby shoes are made easy with a cutter set that makes all the pieces easily fit together. Color them different shades and add different patterns or textures for an endless supply of personalized cake toppers.
This pair is made out of gum paste but could be easily made out of fondant with more drying time. Give them your own twist and see what direction you take them in!
Here’s What You’ll Need:
Colored Gum Paste (I used pink, red and white)
Baby Shoe Cutter Set
Gum Glue with a Paintbrush
Stitcher Tool
Veiner Tool
Craft Knife
Rolling surface, rolling pin
Shortening
Small Piece of Parchment Paper
A Large Zip Lock Bag with one side cut open
A Few Wads of Crumpled Plastic Wrap
Step 1: Roll And Cut Pieces For Shoe
Start by having your tools all ready to go. Next, coat your rolling surface with a thin layer of shortening and roll a small portion of pink gum paste the thickness of the shoe sole cutter (about 1/8″ thick).
Cut the shoe sole out and set it aside on a small piece of parchment paper (this will allow you to move the shoe around when assembling it which is easier).


Next, roll some additional pink gum paste very thin…thinner than the shoe sole so the sides are not too heavy. Cut out the two remaining pieces of the shoe and use your craft knife to remove the eyelet holes.


Use your stitching tool to stitch the outside edges of the two pieces. This will make it look more like a shoe.

Place the two pieces inside the zip lock bag and gently press it flat to get the air out. This will keep your pieces soft while you move on to the next step.

Next, roll out a very thin piece of red gum paste and cut out a second layer for the back of the shoe. Remove the eyelets with a craft knife and place it in the bag with the other pieces.

Step 2: Assemble The Shoe
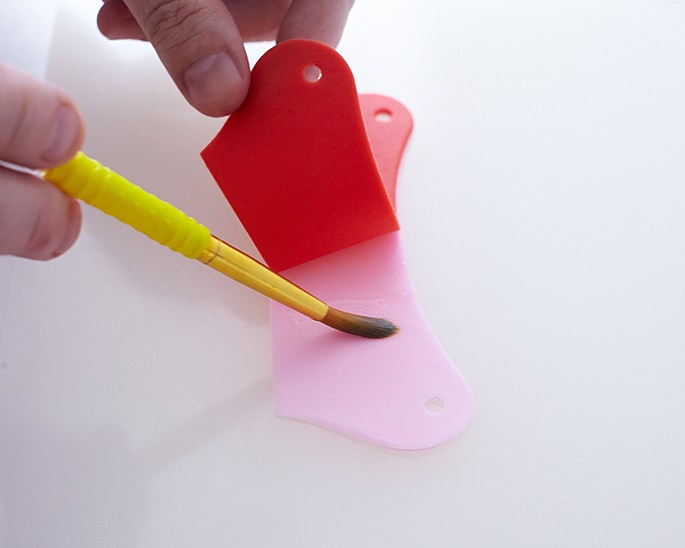
To assemble, brush the edge of the toe piece with gum glue and attach it to the edge of the shoe sole. Immediately stuff the toe with some crumpled plastic wrap to support it while you position it and get it in place.
You can readjust the plastic wrap later to create the exact shape that you want. Use your veiner tool to press the edges together to make sure everything is adhered.


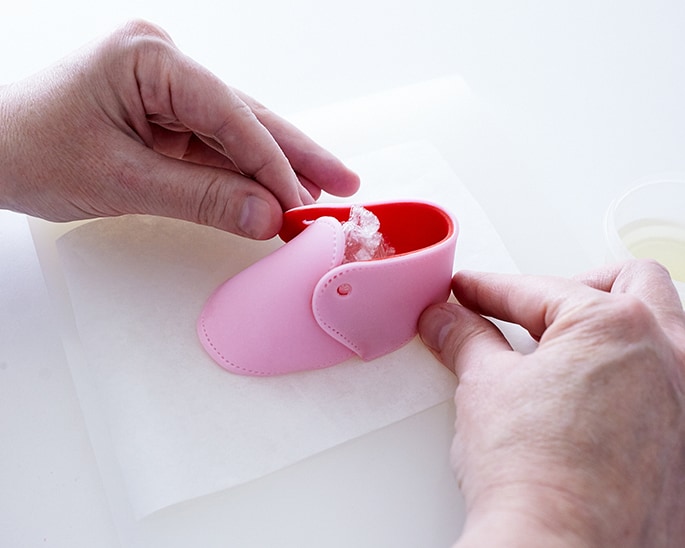
Next, remove the two remaining pieces from the bag. Brush gum glue on the back of the red piece and adhere it to the unstitched side of the pink piece making sure that they line up as exactly as possible. (I had to do a little stretching and fitting to make this happen).
Then, add more gum glue to the bottom inside edge of the red side and position it on the back of the shoe sole, bringing it around to the front and adding a little glue where necessary to get it to stick together.
Step 3: Add Decoration And Laces
Now that your shoe is together, it’s time to add some decoration and laces. Roll out a small piece of white gum paste as thinly as possible and use a piping tip to cut tiny polka dots out ( I used a #6, but feel free to use whatever size you think looks neat).
Add the dots with a touch of glue. I also added a sugar mold heart near the toe to give it a focal point.


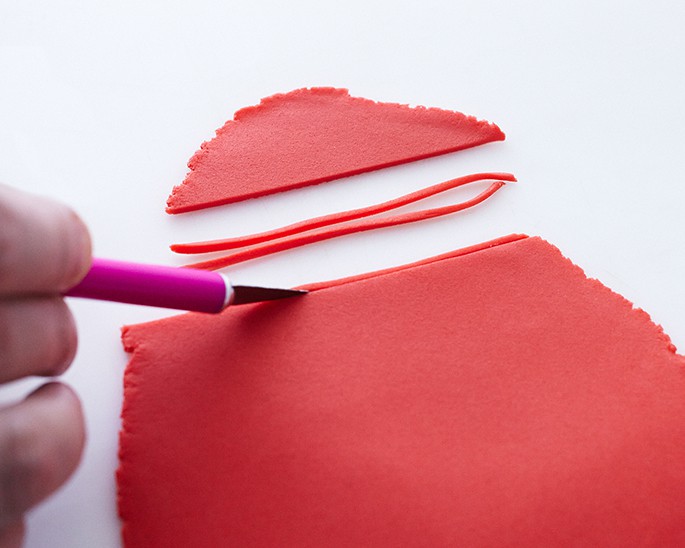
For the laces, roll out some red gum paste very, very thin and cut it into small strips using your craft knife. Stretch a piece from eyelet to eyelet and cut off any excess.
Adhere with glue and use your veining tool to tuck the lace into the eyelets. Then, create two separate bow loops and glue those on top. Create a tiny center piece to cover the intersecting bow loops so that it looks like it’s knotted.
Let the shoe dry for several hours and then peel it off of the parchment paper and lay on it’s side to completely dry.


Thanks for all the kind words! We loved making these and yes, they look just as cute in blue and can be customized a million different ways. They’re great to make ahead to so that you can add them last minute to a freshly iced cake!
Great thanks for the tutorial….helps a lot…:)
These are so sweet! Thanks for the tutorial.
Hi, I just love the entire post and beautiful collection of. And I make sure to visit your site often..
What a great tutorial! I look forward to using it in the future. These would be perfect for a baby shower and you can change the gumpaste color to blue for a boy! Thanks for sharing.
They’re really adorable! I know that they’re not real but at first sight…you can’t see they’re not! I love these baby-shoes! 😉 <3
Marja.