
When it comes to decorating cakes and cupcakes, I don’t like to rely on fondant all the time. I adore using chocolate in my cake designs. Even though the chocolate pieces are fragile, I think they make cakes look very appealing with very little effort.
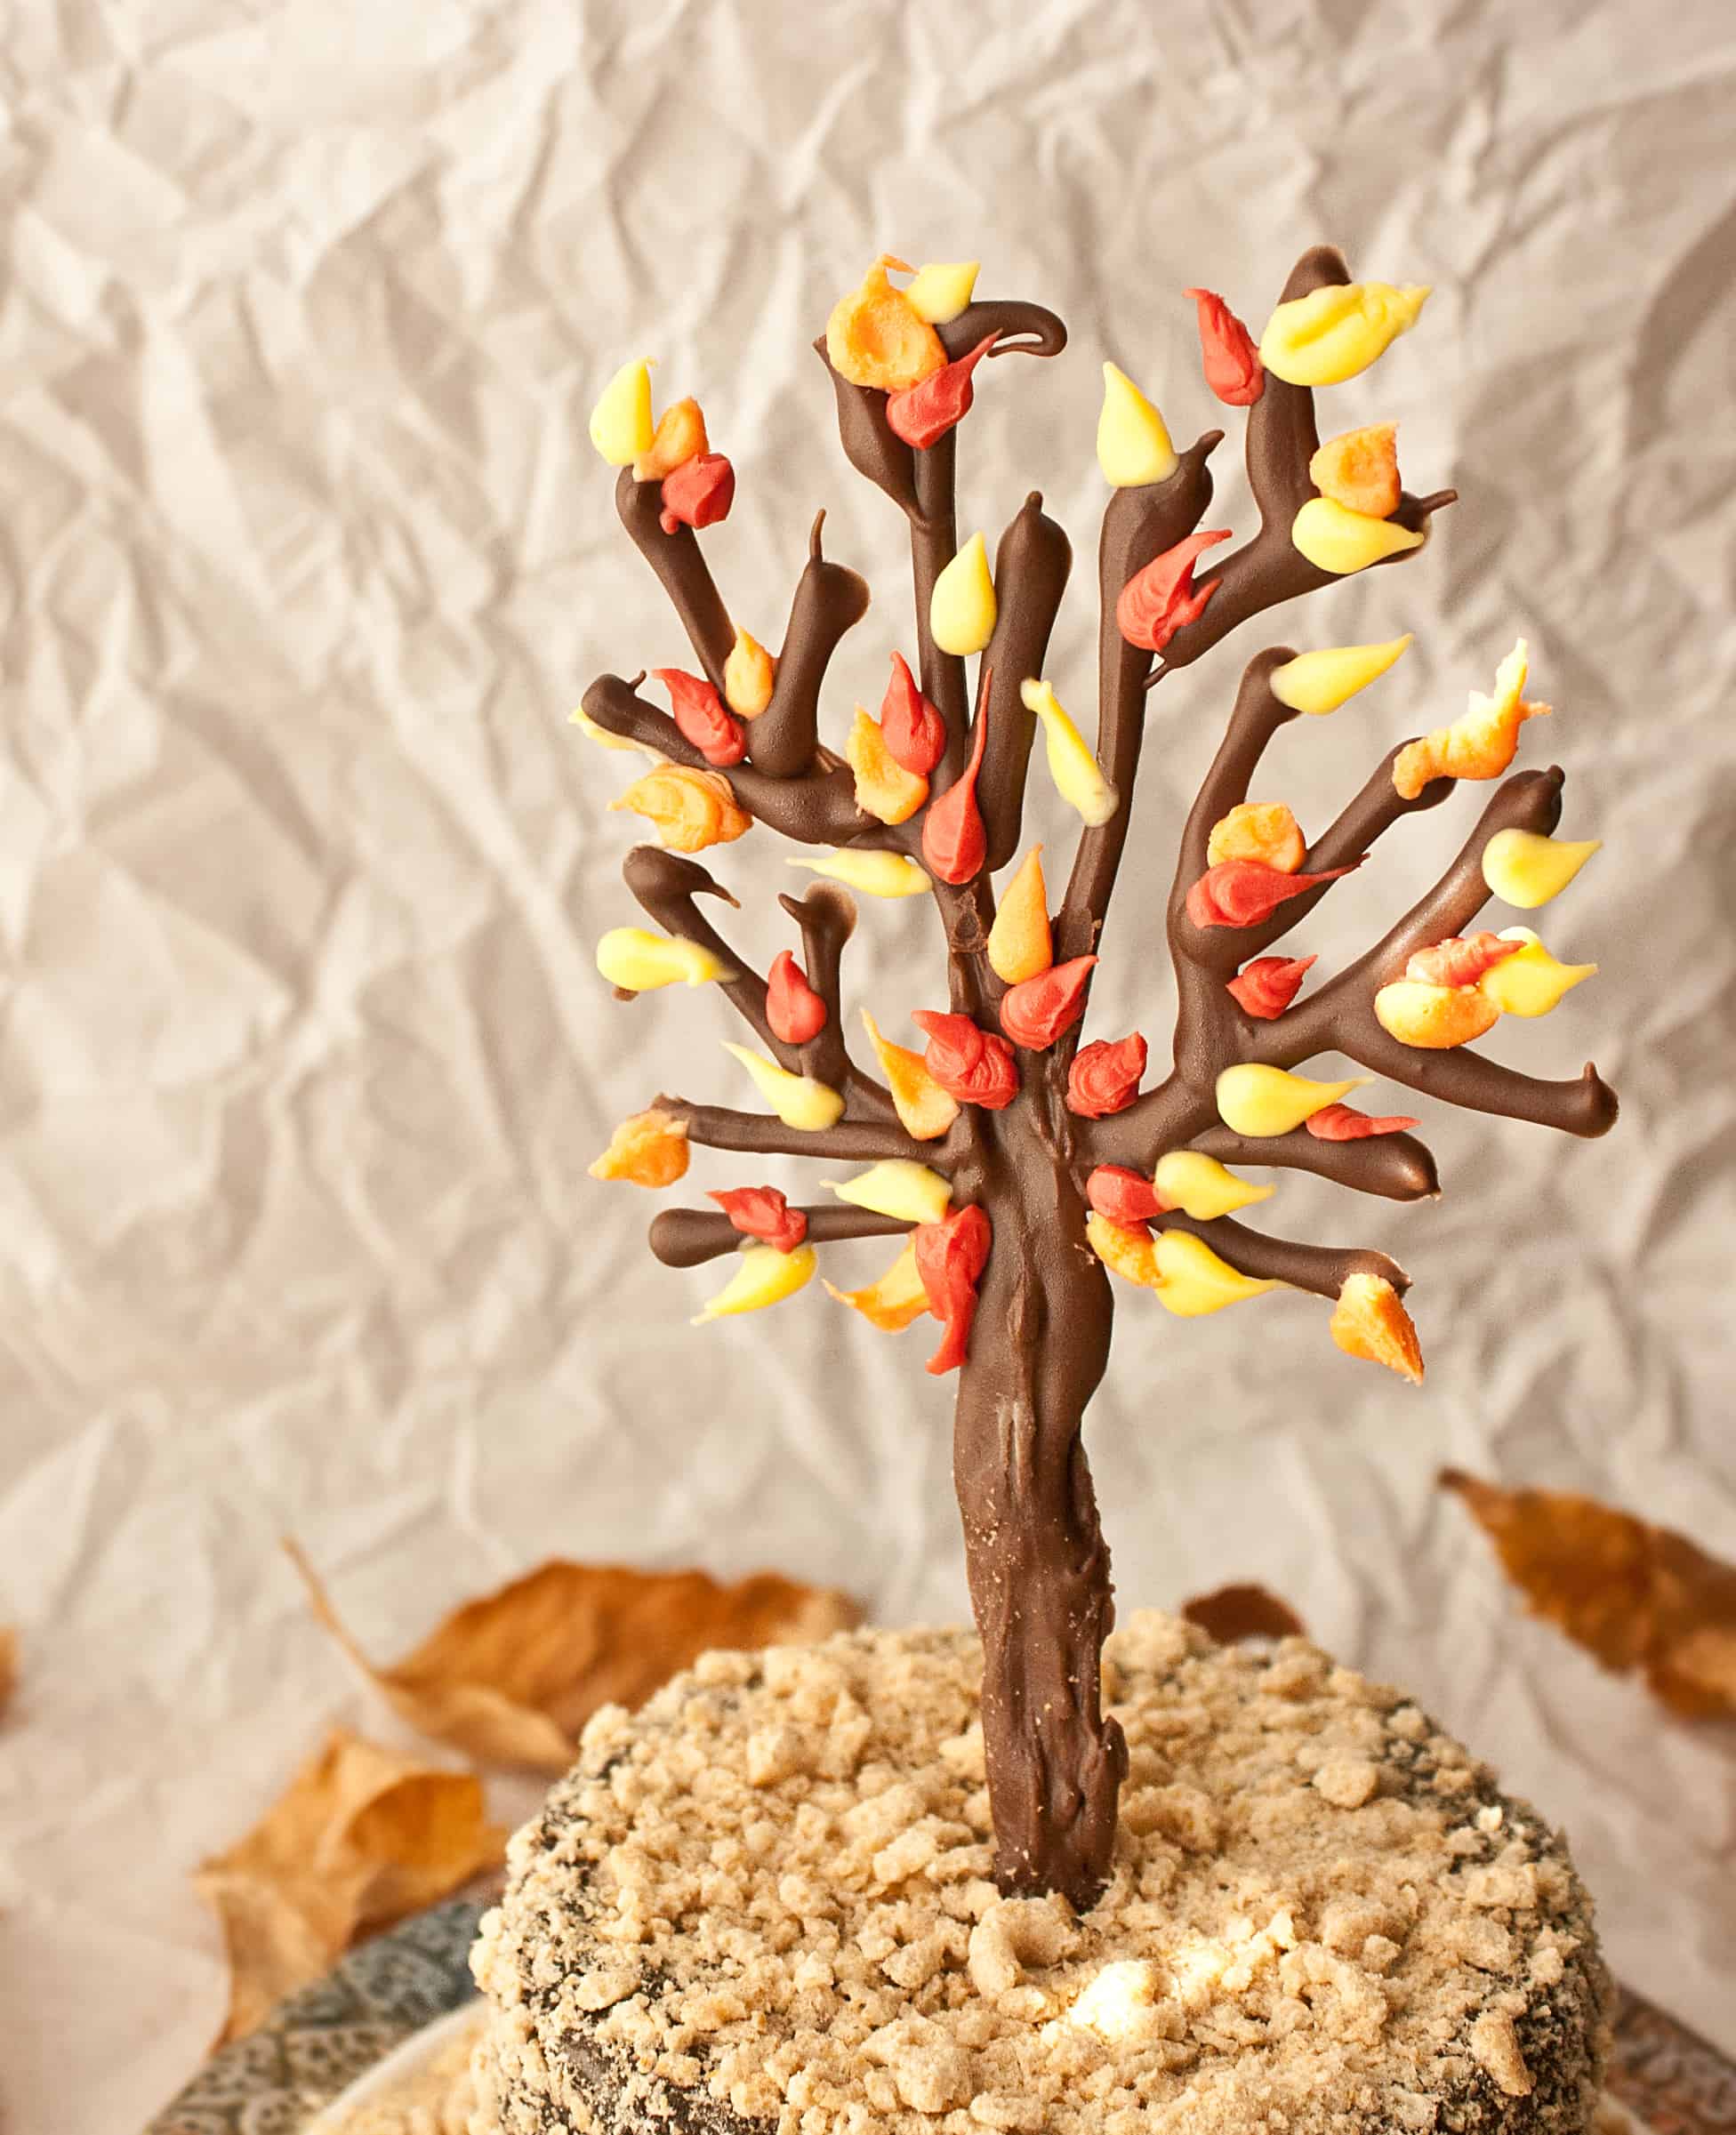
Today, I will show you how to make a Fall- themed chocolate tree. I used it as a topper for a mini cake. You can make a smaller version and use it on top of cupcakes.
To make this tree, you will need the following supplies:
Melted dark chocolate
Melted orange chocolate
Melted yellow chocolate
Melted red chocolate
Piping bags or squeeze bottles
Lollipop sticks
Wax paper
White paper
Tape
Pen
Make sure you subscribe to our Youtube channel to watch more of our tutorials
Step 1:
Start off by drawing a tree on a sheet of paper. It just needs to be a rough sketch. Make sure you know beforehand how big you want this tree to be.
Step 2:
Place a sheet of wax paper on top of this sketch and secure it in place with some tape.
Step 3:
Fill your piping bag or squeeze bottle with melted dark chocolate and outline your tree sketch. It doesn’t need to be perfect. Make sure to go over the tree trunk a few times and make it thicker and stronger.
Step 4:
Place this tree in the freezer for 5 minutes until the chocolate firms up.
Step 5:
Now, fill a piping bag with yellow chocolate and make some yellow leaves randomly all over your tree branches. All you are doing is squeezing and pulling away.
Step 6:
Do this again with orange chocolate and red chocolate and you will end up with more leaves.
Step 7:
Place this tree in the freezer again for 5 minutes, which is what I did.
Step 8:
Then, gently peel the wax paper away from your tree. Flip it over.
Step 9:
Pour some melted dark chocolate along the backside of the tree trunk and stick a lollipop stick here. Let it set.
Step 10:
Finally, push these chocolate trees into your cakes or cupcakes very carefully.
And you are done!
NOTES:
– Remember to make extras coz some trees are bound to break coz they are so fragile.
– Also, don’t touch the trees too much coz that will cause them to melt.
And that’s all for today. I hope you enjoyed this tutorial.
Happy caking everyone!
How long will these last in the freezer please? Can I make them a few days before I need them?
Hi, Rachel! Well, you can certainly try to keep them in the freezer if it’s only for a few days. However, I do not advise you to, as these decorations are extremely fragile. Tell us how that went! Thank you for reading!
This really helped me a lot, and wow! It’s amazing, Thanks!
thanks lot, it,s so nice and amazing.