Fall brings about a change in color and deeper tones. Do you want to learn to decorate a cake like a pro for the fall? When making a fall cake, there’s no better way to express autumn, than by using some flowers that display those pretty colors of fall! Today, I decided to decorate an 8″ torte with some mums and roses perfect for your fall birthday or party.
What you will need:
- plastic pastry bags
- decorating couplers
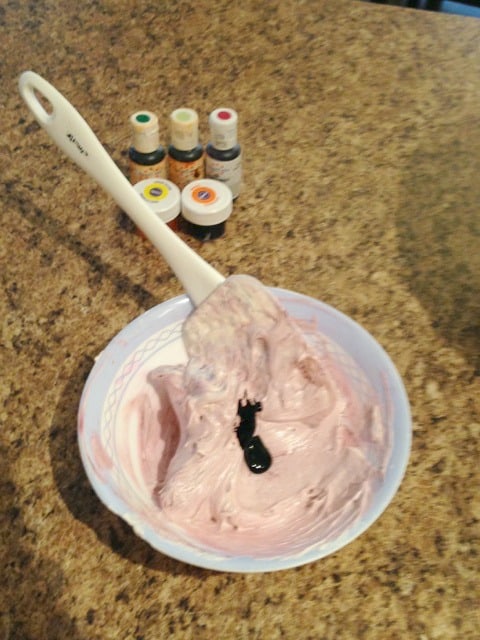
- color gels
- small offset spatula
- rose nail
- undecorated iced cake
Step 1: First I started with a 8″ torte, that I base iced with Italian buttercream.

Step 2: Next, I rounded up some of my color gels. I choose to use lemon yellow, orange, burgundy, forest green and avocado green. I started to mix the colors into my Italian buttercream to get the color shades I wanted for this fall cake. You need to be careful how much burgundy you add to the icing though, because if you add too much, it will create a very very deep burgundy.
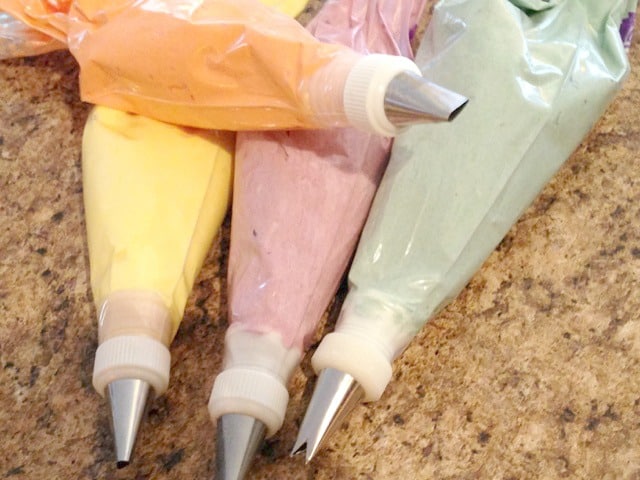
Step 3: The green was created by 2 parts avocado and 1 part forest green. I put a leaf tip on the green. #352
Step 4: For the orange, yellow and burgandy I used a petal tip. # 104
Step 5: I started with the bottom border, holding the orange bag with the petal tip, wide end facing down. Moving my hand from right to left, I pull the icing from the bag creating a ribbon like effect.

Step 6: Next, I’m going to start the flowers. First flower will be a simple fall mum using the #104 tip. For this flower, you want to create your flower base. Doing this, I start by making a circle dap of icing on the bottom. Then a smaller one on top of that. Lastly, a smaller tighter one on the top for a total of 3 circles. To build up the base.

Step 7: Next starting from the top holding the tip with the wide end down. I started to move my tip in a small vertical motion, while going around in a circle around the small circle shape I made.
Step 8: Next, after making the first row of petals. I moved slightly lower and added a second row of petals. This is a simple fall mum. 
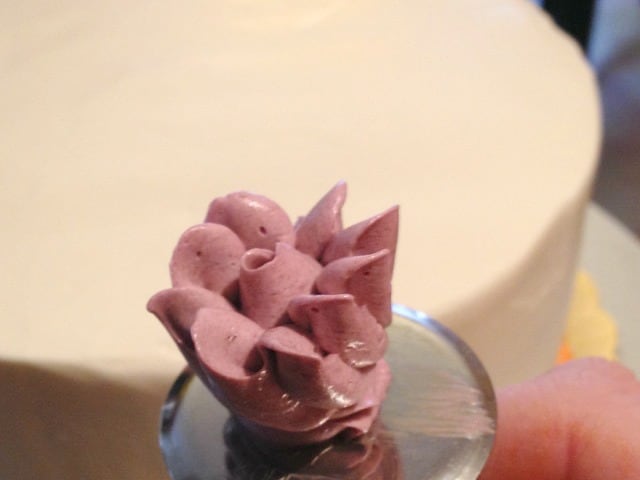
Step 9: Next flower I started, was a wild rose. To make this flower, you want to hold your tip sideways and form a flat circular base. I built this base up with two layers.

Step 10: While still holding the tip sideways, with the wide side towards me I start to pull and form the petals. You want five petals per layer of the flower. I made two layers of petals for these wild roses.
Step 11: After making each flower, I placed them on the left side of the cake.

Step 12: Once all flowers were placed, I used edible sugar pearls to create the center of the flowers for the wild roses.

Step 13: Now just add the leaves, your writing, and a top border and you are finished! Take a moment and enjoy what you created!

Thanks to Vickiann for creating this great fall flowers cake!
You can visit her Facebook to see more of her creations!
Happy Caking!
Thank you for the lesson and a great idea.