
Hi everyone!
Today I’m going to show you how to make a cute teapot cupcake topper. Perfect if you’re going to going for a tea party themed party.
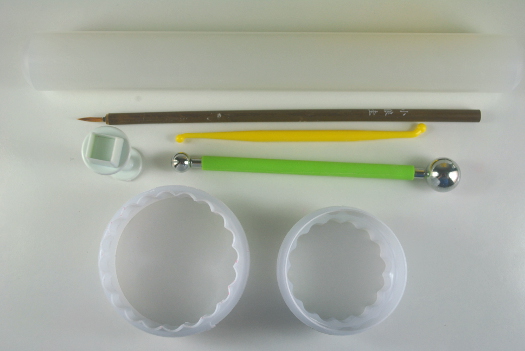
This is what I use:
Fondant/Marshmallow Fondant (an alternative is to use gum paste) in ivory, white and red
Gel food color in pink and green
Ball tools
Scalloped Cookie Cutter
Round cookie cutter (should be smaller than the Scalloped Cookie Cutter)
Small square cutter or plunger
Rolling pin
Tylo glue (here’s how to make it)
Brushes (one flower details of the teapot and one for attaching fondant together)
Cocktail sticks
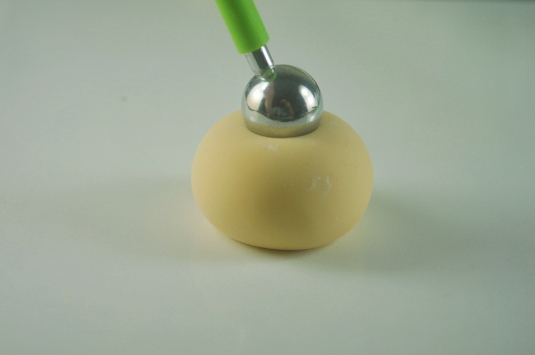
Step 1:
Roll ivory fondant into a ball and press the ball tool on top. Set aside to dry a bit.
Step 2:
To make the lid, get a small piece of fondant and shape it into a half moon. For the lid’s handle, roll the fondant into a short rope, connect both ends and place on top of the lid.

Step 3:
To make the teapot’s handle, roll the fondant into a long rope. Then using a small ball tool, attach one end near the lid of the teapot.
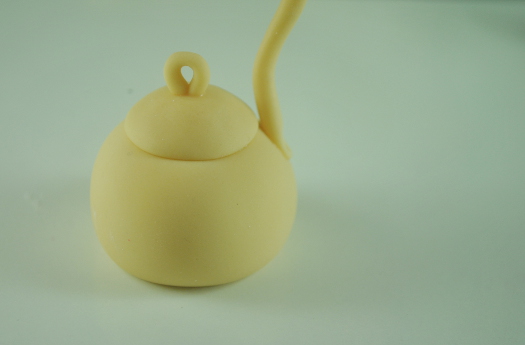
Step 4:
Bend the rope and attach the other end on the lower part of the teapot. To make the spout, form a piece of fondant into a tear shape. Using a small ball tool, create an opening at the narrower end. Then attach the wider end to the teapot.

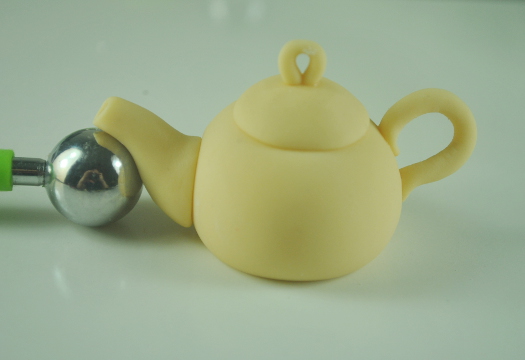
Step 5:
Use a ball tool to support the spout while it dries.
Step 6:
Now, to make a picnic blanket where we can place the teapot, roll red fondant and cut out circles using the scalloped cookie cutter.

Step 7:
Using the small square fondant cutter, make red and white squares. Arrange them in alternating colors on a thinly rolled white fondant. Cut a circle from it.

Step 8:
Place the circle on top of the round scalloped red fondant. Place the teapot on top of the picnic blanket.

Step 9:
Now this step is optional, I added a flower design on the teapot. You can create any design you like for the teapot. The possibilities are endless!

Hope you like the tutorial everyone!
Happy Caking!
Aikko
Thanks so much
So cute!! And I love the step by step photographs – you make it look so easy. 🙂
It’s so cute. Thanks for the tutorial