
These simple spooky silhouette cupcake toppers will make a statement at your Halloween party. This fun technique uses stamped fondant with melted chocolate accents.
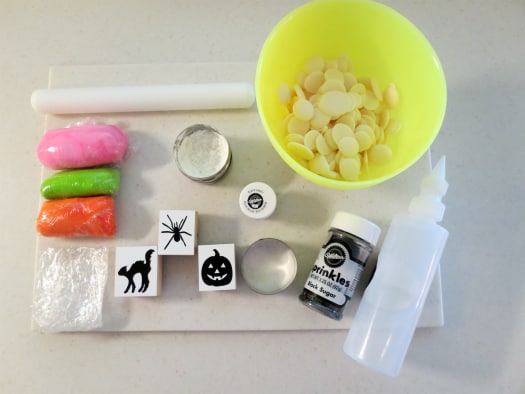
This is what you need:
Work surface
Corn starch
Rolling pin
Fondant in pink, orange and green
Candy melts
Black candy color
Piping bag
Black sugar sprinkles
2.5 inch circle cutter
Festive rubber stamps (they will not touch the fondant)
Plastic wrap
X-acto knife

Step 1: Dust the work surface with corn starch. Roll out the first color of fondant rather thick.

Step 2: Place a piece of plastic wrap over the fondant. This allows you to have a barrier between the rubber stamp and the fondant. The rubber stamps are not food safe.

Step 3: Through the plastic wrap, firmly press the rubber stamp to create a deep impression.
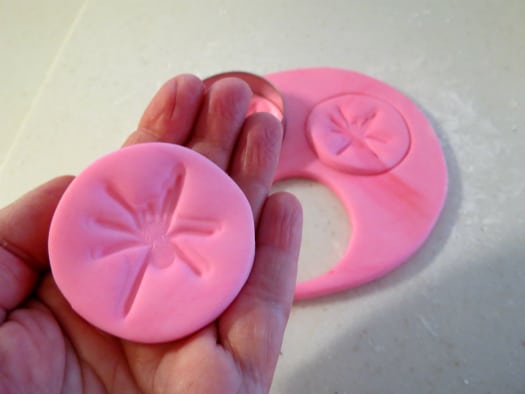
Step 4: After creating several stamp impressions in the fondant, use the circle cutter to cut out the toppers. Try to center the stamp impression.

Step 5: Through trial and error, I found that some stamps left better impressions behind than others, so I added some new ones to my set.

Step 6: If you have an oblong or oddly shaped stamp that won’t fit in a circle, you can still use it. Just make the impression, then cut around the edge with an X-acto knife leaving a border.

Step 7: If you are short on time, you can stop here. The toppers look great with just the stamped impressions!
From this point, there are several ways you can create contrast to make the silhouettes stand out. I chose melted chocolate. But you could also color them in with edible marker or paint them in with black gel icing color.

Step 8: Follow the instructions on your candy melts to bring them to a smooth thin consistency.

Step 9: Color the melted chocolate with black candy color. Do NOT use gel icing color to tint chocolate because it will seize. Candy color is made to color chocolate since it is oil based.
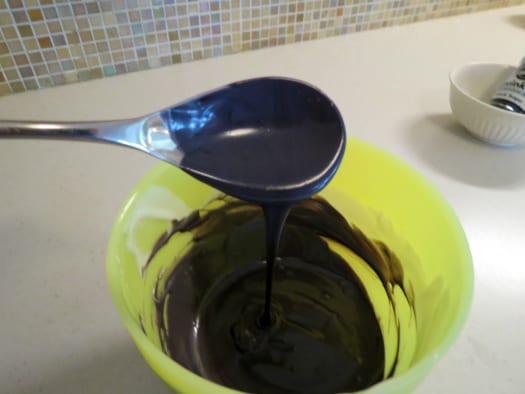
Step 10: Mix well until you achieve the desired tone.

Step 11: I used a piping bag to achieve the best hand control. Cut a very small opening and work carefully.

Step 12: Have fun accenting the toppers by highlighting letters and filling in silhouettes with the black chocolate.

Step 13: To achieve a sparkly effect, sprinkle black sugar on the chocolate before it dries. If it has already dried, brush a light coat of corn starch on the chocolate silhouette and then press it in the sugar.
Allow the toppers to dry on a parchment-lined cookie sheet for 2-3 days. Then place them on your cupcakes and enjoy your spooky treats!
Happy Caking!
Renée
This tutorial was created by Renee Daly
Hi…where can I get the stamps?
I got them at Michael’s Craft store.
Hi…where do you get the stamps from?
I got them at Michael’s craft store. They are the Martha Stewart brand.
Did u mean corn syrup to spread on fondant to attach sugar crystals?
Yes! Thank you for catching that! 🙂