
I use my silicone pearl molds almost every week for cake borders and I’m asked over and over again about how to use them. So a few weeks ago I took some pics while working on a cake and today I’m sharing How to Use a Silicone Pearl Mold.

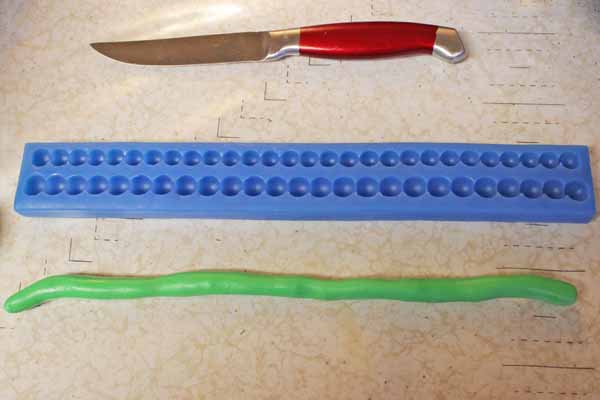
The tools required are pretty simple. Here’s what I use:
- Silicone Pearl Mold (First Impressions molds are my favorite brand)
- Fondant
- Sharp knife
- Sugar glue (not pictured)
Step 1: Warm the fondant until it’s soft and roll out the the fondant into a long rope. You’ll want the rope to have a diameter very close to the size of the mold you’re using. I’m using the largest mold for this tutorial (14mm), so my rope is just over a centimeter around.
Step 2: Lay the rope of fondant over the mold and begin to press it into the mold. Use your fingers to push it down tight into the mold so that you get fully shaped pearls.

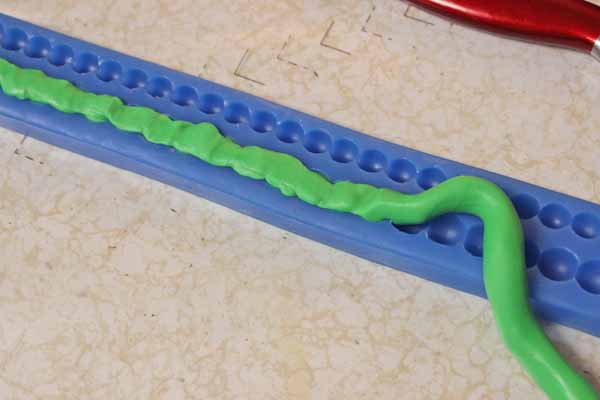

Step 3: It’s nearly impossible to get your rope of fondant the perfect size to fit the mold, so after it’s all pressed in really tight, use a sharp knife to trim any excess fondant off the top. I like to lay the knife perfectly flat against the mold and trim from one end to the other.
Be very careful not to cut your mold!


Step 4: Usually by now my fondant has cooled enough that it’s pretty firm. If your fondant happens to still be really soft, you may want to pop it in the freezer for a few minutes to firm it up so it doesn’t stretch when it comes out of the mold.
If it’s already firm, flip the mold over upside-down and begin bending it backwards and the pearls will pop out.
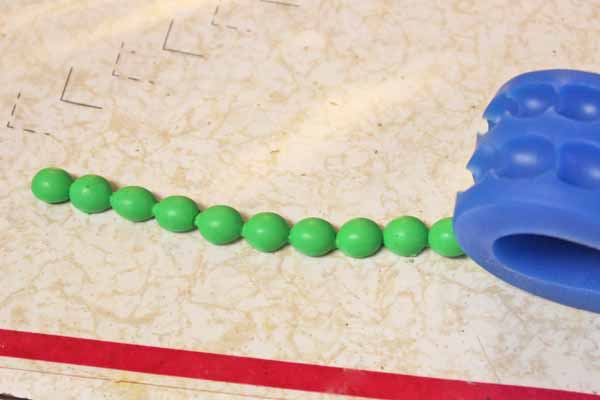
Keep bending it backwards until it’s completely out.

Step 5: Let the pearls “dry” or harden for about 10 minutes, then they’re ready to use! If you move them sooner, they’re more likely to stretch and lose their shape!
To put them on as a border, I paint a tiny amount of sugar glue onto the cake, then lift the pearls and apply them to the cake, with the flat side vertically against the cake (not on the board or the cake below).
And you’re done! If you have any questions, be sure to leave a comment! I used Tappit Letter Cutters for the name on this cake and you can find my tutorial for how to use Tappit Letter Cutters here.
Happy Caking!
Rose
Question: I need to make fondant/gumpaste pearls for a wedding. How do I properly store the pearls so they can remain flexible at the wedding/cake site? How much in advance can I make them?
I make them, then store them in an airtight container with wax paper in the bottom (and between layers if you have lots) and then FREEZE them. Before you put them in, dust them with a little bit of cornstarch and leave gaps between them so they’re not all touching. SHortly before you’re ready to use, take them out of the freezer and spread them out. They may get a little condensation on them, but it’ll dry in 10-20 minutes. Keeping them cool/cold prevents them from hardening and drying out so they’ll still be flexible for you to put on the cake.
Thank you Rose for your quick response. So, let me get this straight: Can I store them in layers, without touching, one row stacked on top of another with wax paper in between? I have the same silicone mold: How many should I make in order to cover a 6, 8, 10 + 12 heart cakes?
Ooops! I forgot to ask: The cake that I have to do, the bride wants it in Buttercream Frosting. Would the pearls adhere well into buttercream?
Wanda – you’ll just have to get a measuring tape and measure the outside perimeter of each pan to get a total length needed (in inches), then divide by 12 (or however long your mold is – mine is 12 inches). I always make 2-3 extras just in case. And yes, you can just lay several in the bottom of your container, cover with wax paper, do another, etc. Yes, they’ll stick to buttercream just fine. If it’s really crusted, you may want to paint a thin layer of simple syrup on the back of the beads to help them stick.
wonderful points altogether, you simply won a new
reader. What might you suggest about your submit that you made a few days ago?
Any positive?
My Son is getting married, could you tell me how many tiers of cake we need to feed 150 people. We went for a consultation and were told 6″ 9″ 12″ round. The layers are 2-2″. Do you think this will be enough for 150 people? thanks
Personally, I would not think that’s enough cake. I’d probably do 6″, 8″, 10″ and 14″ to get 152 servings.
I love the sugar glue idea!! I have never used fondant, but I will definitely use the sugar glue for cake pop projects. Thanks so much for the post 🙂