
Do you want to build a snowman cupcake topper? Let me show you how it’s done……

This is what I used:
Work surface
Corn starch
Small rolling pin
2.5 inch circle cutter
Large edible white pearls
Fine tip black edible marker
X-acto knife
Small ball tool
Fondant in blue, white, orange and black
Wilton icing writer (or edible glue) not pictured

Step 1: Roll out the blue fondant and cut out circles for the background of your cupcake toppers. Set them aside.

Step 2: Roll out smooth, one-inch balls of white fondant for the faces.

Step 3: Using your hands, mold the balls into pear shapes.

Step 4: Using your small roller, flatten the top portion of the heads.

Step 5: Use your fingers to pinch in the top (forehead) area of the faces.

Step 6: Similarly, you must use your fingers to pinch and define the chin areas.

Step 7: Use a toothpick to outline where the smile will be on each face.
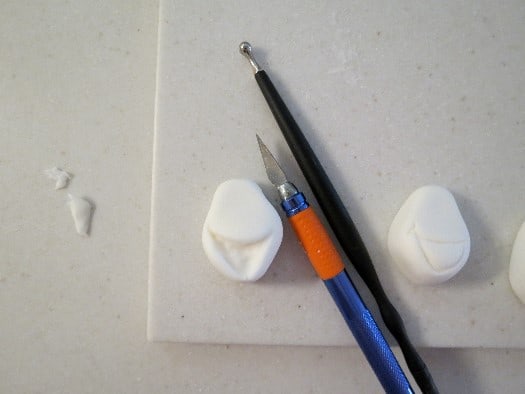
Step 8: Use the X-acto knife to trace the smile outline and carve it out slightly. Then use the ball tool to smooth the mouth area.

Step 9: After the mouths are carved out and smoothed they will look like this.

Step 10: We will use the edible pearls for eyes, but first we need to create eye sockets.

Step 11: Use the ball tool to indent eye sockets that are wider than the pearls. The character has black eye sockets, so they will be colored black after they harden for a few minutes.
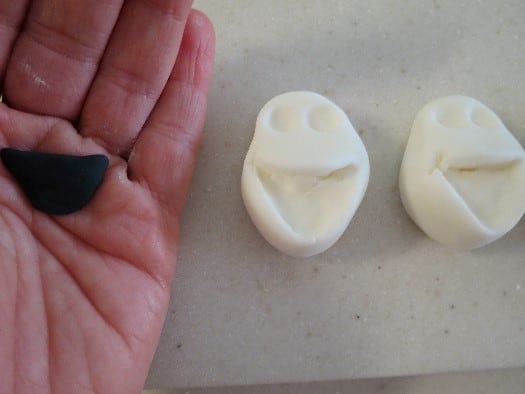
Step 12: Now to work on the mouth detail…roll a small ball of black fondant and form it to the shape of the mouth cavity.

Step 13: Wet the back of the black shape and press it in place. Use th ball tool to smooth it out into the corners of the mouth cavity.
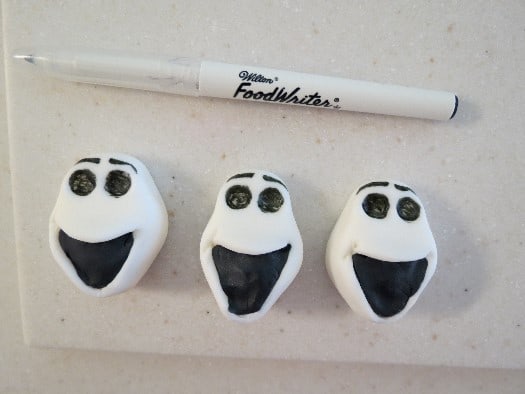
Step 14: After completing the mouth, use the edible black marker to gently color in the eye sockets and draw the thin eyebrows.

Step 15: Use a dab of icing writer as edible glue in each of the eye sockets and press the pearls into place.

Step 16: While the pearls dry firmly in place, move on to the nose. Roll a small ball of orange fondant for each nose.
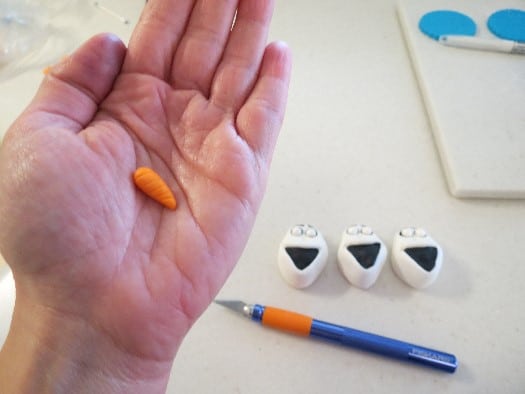
Step 17: Roll it thinner on one end to resemble a carrot and carve small lines in it with the X-acto blade for detail.

Step 18: Attach the nose with a bit of water as glue. Attach the head to the blue base by wetting the back of it and placing it on the background. (Tip: I drew a few hairs on the background before attaching the face.)
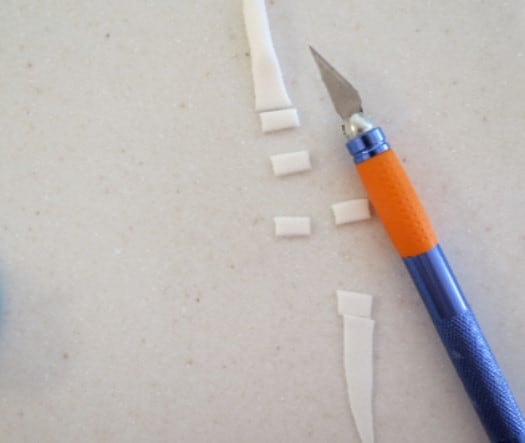
Step 19: Roll a small snake of white fondant and cut out rectangle shapes for the teeth.

Step 20: Slightly wet the back of the teeth and attach them in place on the mouths. Use a toothpick to move them into place if needed

Allow your toppers to dry on a parchment-lined cookie sheet for a few days before using them. I hope they bring a smile to someone’s face!
Happy Caking!
Renée
I loved this tutorial. will make some this weekend. thanks
thank you! Have fun making them!
These are super cute and a well explained tutorial! I have a question about putting fondant on frosting. I know no one will be able to see it in this instance, but would the blue coloring bleed into the white frosting underneath? When I make fondant toppers I’m always worried that this will happen, but maybe I’m just paranoid.
Cute! Next week I’m making an Else cake and want to surprise the birthday girl with Olaf cupcakes. Your post helps!
Crazy amounts of cute!