
Animal cupcake toppers are a fun way to dress up any cupcakes. They can be used for any occasion: baby shower, birthday cakes, etc. These elephant cupcake toppers are super cute and really easy to make.
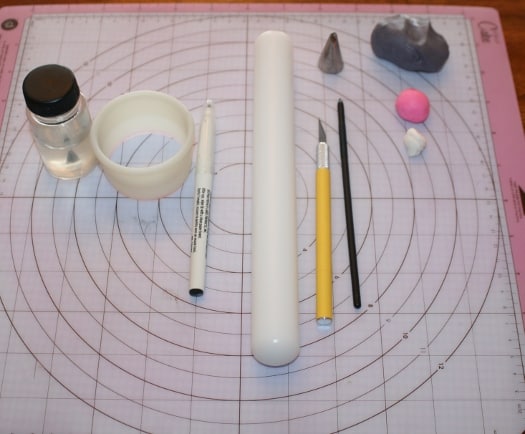
Here is what I used:
Fondant (grey, pink, white)
Rolling pin
Edible black marker
Zacto knife
Round cutter (about the size of your cupcake circumference)
Edible gum glue
Any piping tip
JEM tool – Flower Veiner # 12 (but any tool with a pointed end would work)
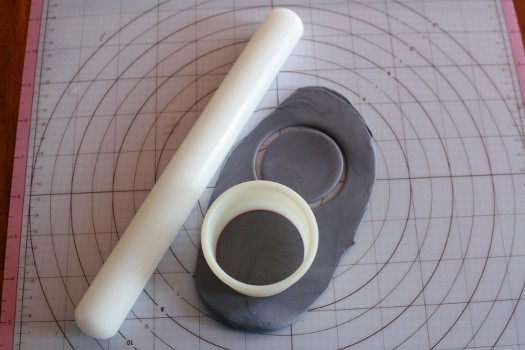
STEP 1:
Roll out the grey fondant to about 1/4 of an inch. Use the round cutter and cut a circle. This will be the base of the cupcake topper.
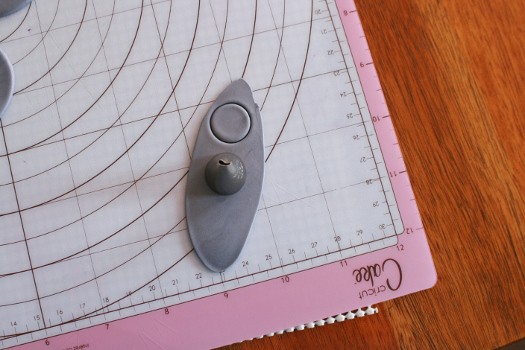
STEP 2:
Roll out another small piece of grey fondant. You can roll this piece thinner as it will be used to make the elephant’s ears. Using any piping tip, cut out two small circles.
After cutting out the two ears, use your thumb to press out the ear. You will want them to look less like a perfect circle and more like a wavy oval.

STEP 3:
Using the pink fondant, roll out two small balls. These will be used for the inner part of the elephant’s ear. Use your judgement, the balls should be small so that when you flatten them out they will fit about half of the grey piece of ear.
After you roll the pink fondant into small balls, press them flat with your thumb. Using a little bit of the edible gum glue, attach the pink pieces to each of the grey pieces of ears.
After you have attached the pink fondant pieces to the grey ears, press them out again with your thumb so that they become one piece rather than two pieces attached together. You will want them to look as if it is one piece. Set them aside.


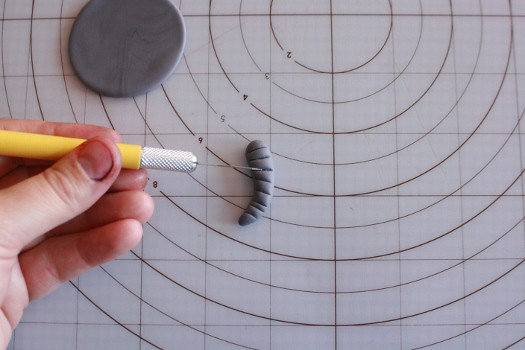
STEP 4:
Roll out a medium piece of grey fondant into a ball. This will be used to create the elephant’s trunk. Once you have create a smooth ball, roll the piece into an elongated piece.
Position the elongated piece of fondant to the shape of a trunk (making it look like a soft “J”). Once you have created this shape, use the Zacto knife to cut slits into the trunk.


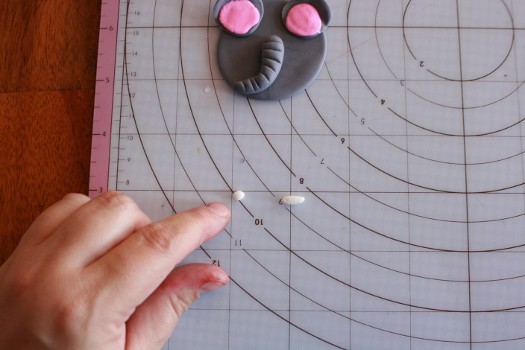
STEP 5:
Using a tiny amount of white fondant, roll two small smooth balls. After you have made two smooth balls, roll the balls into elongated ovals. These will be used as the elephant’s tusks.
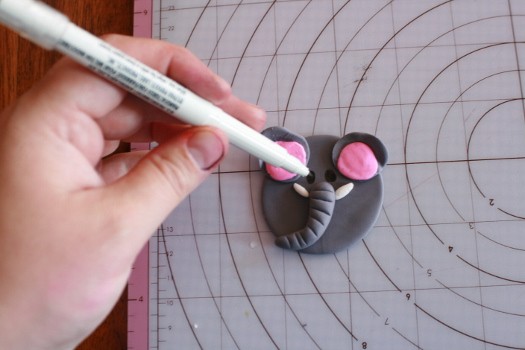
STEP 6:
Now to assemble the elephant topper: Using a tiny amount of edible gum glue, glue on the elephants ears, truck and tusks. Once you have glued on all of the parts, use the black edible marker to draw on the elephant’s eyes and some hair between his ears.


STEP 7:
To make the elephant’s ears look more realistic you can try to curve them and make them a little wavy rather than lay flat. Pinch the elephant’s ear with your thumb and index finger. This will create the ear to come together.

And……there you go…..cute, adorable Elephant toppers!

Happy Caking!
Diane
what a cuttie, I have a “Noah’s” cake for next week. this will be helpful.
Great tutorial !!