
For more months than we’ll talk about here, I’ve been wanting to do a tutorial for How to Make a Buttercream Shells Cake.
This technique is really easy to do but the finished look is very pretty and elegant. You can change the look a little with different pastry tips and you can make the design even more interesting by doing an ombre effect.
Today I’m going to show you the basic technique to start with.

You’ll need:
- A prepared cake (filled, stacked and covered with a thin crumb coat of frosting)
- Buttercream – I used my Vanilla (American) Buttercream recipe
- A piping bag
- Open Star Tip (I used a 2D)
- Small Spatula
- Sprinkles (optional)

This is the frosting tip I used… the Wilton 2D. Another similar tip is the Ateco #825 – but it’s a little larger. Once you have your frosting bag filled prepped, you’re ready to start.

You’ll want to start at the bottom of the cake and pipe on a shell, pulling away to the left (or right if you prefer) and tapering it off. Then move up and pipe another… and another until you reach the top of the cake.

For the next row of shells, start piping before the end of the previous row, so that there’s an overlap and none of the underlying cake can be seen. Again, go bottom to top.
Continue this pattern until all of the sides of the cake are covered:
When you get to the end (or where the shells run into each other), pipe one last row, doing your best to make them meet without leaving any cake exposed:
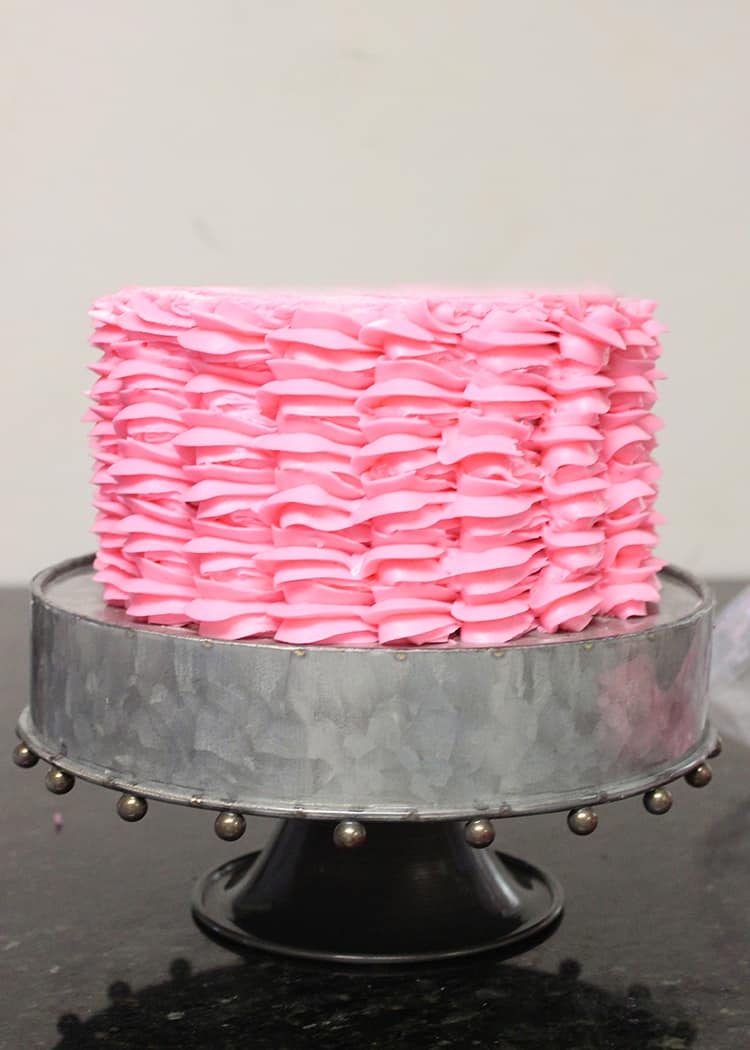
You can see toward the left side that that row is a little “off” – but the seam is hardly noticeable!

Now, using a small spatula, cover the top of the cake with a thin layer of frosting and smooth down the tops of any shells that are sticking up. I knew I would be adding sprinkles, so I didn’t worry about getting that top layer of frosting perfectly smooth, but if you’re going to leave it “blank”, be sure to get a nice smooth finish.

Once you have it smooth and all covered, take up your piping bag again and add a shell border all around the top. I’ve actually seen this technique done where the entire top was also covered in shells and it’s beautiful that way too, but I like to leave the top smooth.

Add some sprinkles and you’re done! Or you could also add a number or “Happy Birthday” or a personalized topper. The sky’s the limit!
What I love most about this cake is that it’s really beauti
I bought the Russian nozzles but cream was too soft.The flowers were mushy.Can you please give me a buttercream recipe that’s harder. thank you
Hi Rose,
your tutorials are always fantastic, you are so generous in sharing your techniques with us.
Best,
Ziba
Thank you Ziba! xx
Hi Rose
Love this cake decoration will try it out. love the colour will go great with my strawberry flavour sponge 🙂
Hey Rose,
Such a gorgeous cake! Thanks for sharing the method. I’ll try it for my sister’s birthday 🙂