
If you are a cake decorating enthusiast like me, the odds are you have a collection of tools at home. I chose a popular mold from my collection and decided to give it a holiday spin to make adorable snowman toppers that are in the shape of cupcakes!

This is what you need:
Work surface
Corn starch
Wilton “Kids Party Designs” mold
Paring knife
Large black sprinkles
Fondant in white, black, orange and pink
Pink and silver edible dust
Small brush

Step 1: To make the shape of each cupcake snowman, get out yor mold, white fondant and corn starch.

Step 2: Roll a small ball of fondant so it is smooth and coat it in corn starch.

Step 3: Press the fondant into the shapes of the cupcake mold. If your hands re coated in corn starch, you can easily press the excess fondant to the side.

Step 4: Remove the excess fondant until you have the proper amount in the mold shapes and smooth out he back with your fingers.

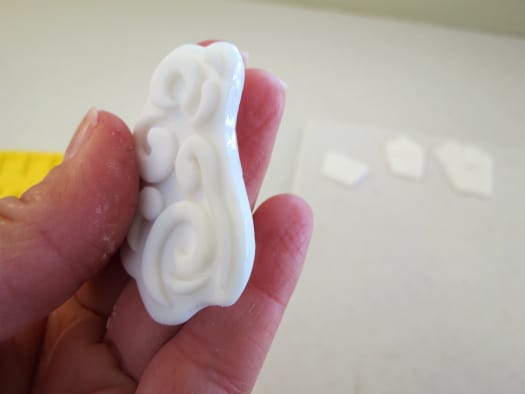
Step 5: Gently bend the mold until the shape starts to release.

Step 6: The fondant cupcake shape will easily drop out of the mold on to your work surface.

Step 7: I used the large cupcake shape for the male snowmen and the small shape for the snow woman.
Step 8: Wet the bottom edge of the icing and attach the two cupcake pieces together.

Step 9: With a small brush and pink edible dust, apply blush to the cheek areas.

Step 10: This step is easier to do before adding the facial features.

Step 11: Now to add the black eyes and mouth, use the large sprinkles.

Step 12: I was able to press them firmly into the face and they stayed. If you have trouble with them falling out, attach them with a dot of royal icing or edible glue.

Step 13: For the noses, go back to the mold and use orange fondant in the striped bunting shape to create carrots.

Step 14: Shape the carrots to narrow them with your fingers and trim them to size with the paring knife.

Step 15: Attach the noses with water.

Step 16: To make the top hat for the snowmen, use the striped bunting and candle stick from the mold. Press black fondant into these two shapes.

Step 17: Trim the two black shapes s shown and attach them as the brim and top of the hat.

Step 18: This picture shows the two top hats attached to the snowmen. I also used the small bow shape from the same mold to make an accessory for the snow woman. Allow these cupcake toppers to dry for 3 days on a parchment-lined cookie sheet and then serve them on cupcakes!
These toppers are so fun and easy to make. It would be a great snow ay project with the kids!
Happy Caking!
This tutorial was created by Renee Daly .
These are soooo cute Renee!!
Thanks Rose! Xo
nice
Thank you!