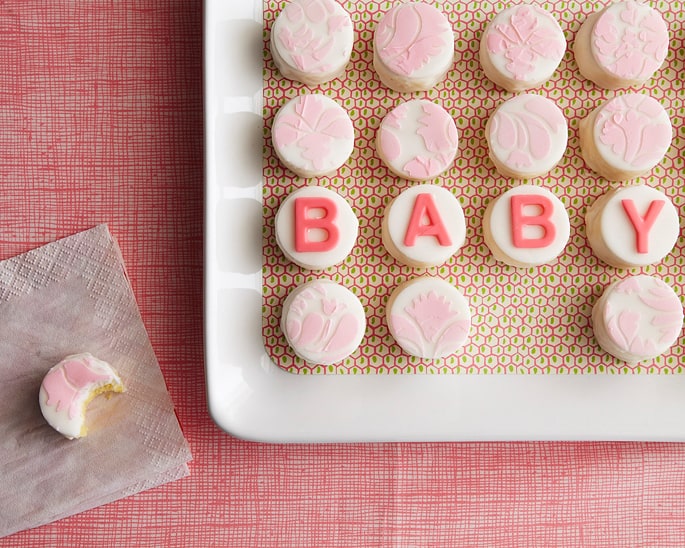
Stenciled petit fours are really easy to make and work for so many different occasions. This time around we’ve left a few plain little cakes for the word “BABY”, but they’d work just as well completely covered in the pattern.
A damask stencil makes the finished presentation elegant, but mixing up the stencil would give them a whole new look; polka dots for a more festive approach, chevron to keep it hip, or stripes to keep it classic. The design is up to you!
This recipe makes 16 petit fours.
Here’s What You’ll Need:
- 1 10 oz Store Bought Pound Cake, Frozen
- 2 Tubs of Vanilla Store Bought Icing
- 1 1/2″ Diameter Circle Cutter
- Pink Gel Paste Food Coloring
- Damask Cake Stencil
- White Fondant
- Small Portion of Pink Fondant
- Mini Alphabet Cutter Set (if creating a message)
- Sheet Tray Fitted With A Cooling Rack


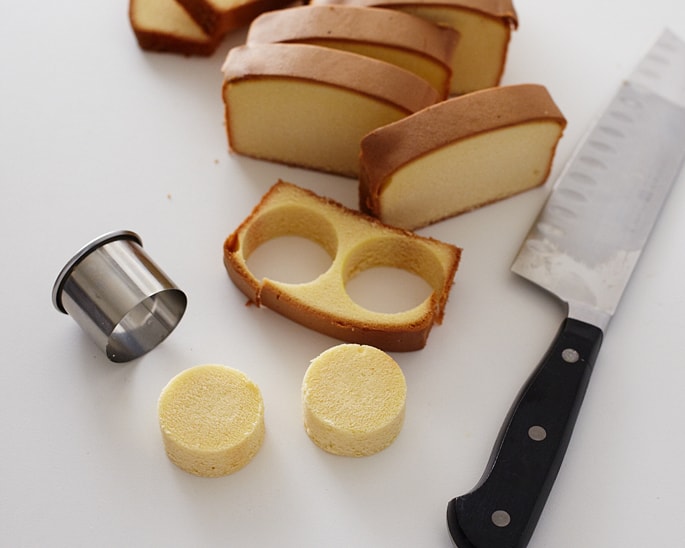
Step 1: Cut And Ice Petit Fours
Remove the pound cake from the freezer and let it soften for a few minutes and then slice it into 8, 3/4″ thick slices. Use your circle cutter to cut two discs from each slice (save your extra scraps for cake pops!).
Place the discs on a sheet tray fitted with a cooling rack. In the microwave, heat one of the tubs of vanilla icing for 10 seconds, remove and stir and reheat for 5 -10 more seconds.
You are looking for a consistency that is like a thick glaze so adjust your heating as necessary. (If you accidentally overheat the icing, let it sit for a few minutes to thicken up).
Next, pour the icing over each disc of cake being sure to cover each one completely. If you run out of icing, remove the rack, scrape up the icing from the tray and reuse it, reheating the icing again if necessary.

Step 2: Roll Fondant And Stencil In Buttercream
Next, roll out a sheet of white fondant larger than your stencil and about 1/8″ thick. Cut out 4 plain discs along the edge of the fondant sheet and set them aside. (These discs are for each letter of the “BABY” message, so adjust depending on what message you want).

Then, tint the remaining tub of icing bright pink. You definitely want some color contrast so make sure to make this color bold.

Hold the stencil in place and smear a generous layer of icing on top of it, making sure to cover it completely. Do not let the stencil shift or you will have a blurred pattern.

Next, go back and evenly remove excess icing so that you have a nice flat, thin layer. You should be able to see the stencil clearly after scraping off the excess.

Carefully lift and remove the stencil. You should be left with a clean pattern.


Step 3: Decorate the Petit Fours
Top four of the petit fours with the white fondant discs. Brush the pieces with a touch of water to adhere to the fondant, if necessary.
Next, roll out a small portion of pink fondant and cut out “BABY”. Adhere those to the tops of the four white petit fours with a touch of water.


Then cut out a circle from the patterned section of the fondant and place it on top of each petit four. Once again, brush the little cakes with a little water to adhere to the fondant, if necessary.
Once they are finished, use a small offset spatula to gently remove the petit fours from the tray and place them on a serving tray or in individual mini liners.

Become more creative and create more designs for these petit fours like fondant roses and easter gum paste decoration.
How many mini cakes are made from one pound cake
Great explanation,really clear ????
Thanks a lot, Coby! Really glad to know I could help! Keep up the great work!
I love this tutorial! Thanks a lot 🙂
rebecca
icing-sugar.net
Love these!!
Très joli !