I’m not sure which came first, my love of tie-dye or my love of cupcakes. But the two have always been my favorite forms of expression. Before we even started this blog, I would bake tie-dye cupcakes with tie-dye icing for my friends and family whenever I had the chance. I’m about to show you how easy it is to add a pop of color to any of your favorite home-baked goodies – my two favorite ways to make tie-dye icing. Let’s get started!
What You Need To Make Tie-Dye Icing For Cupcakes:
- 2 sticks unsalted butter;
- 4 cups confectioner’s sugar;
- 2 teaspoons vanilla extract;
- At least 4 different colors of food coloring;
- Pastry bag;
- Icing tip;
- Spatula;
- Paint brush for food (you can find this in your local baking supply store or even the baking aisle in the supermarket – or on Amazon!
- Your favorite un-iced cupcake, cake, or dessert to put the icing on.

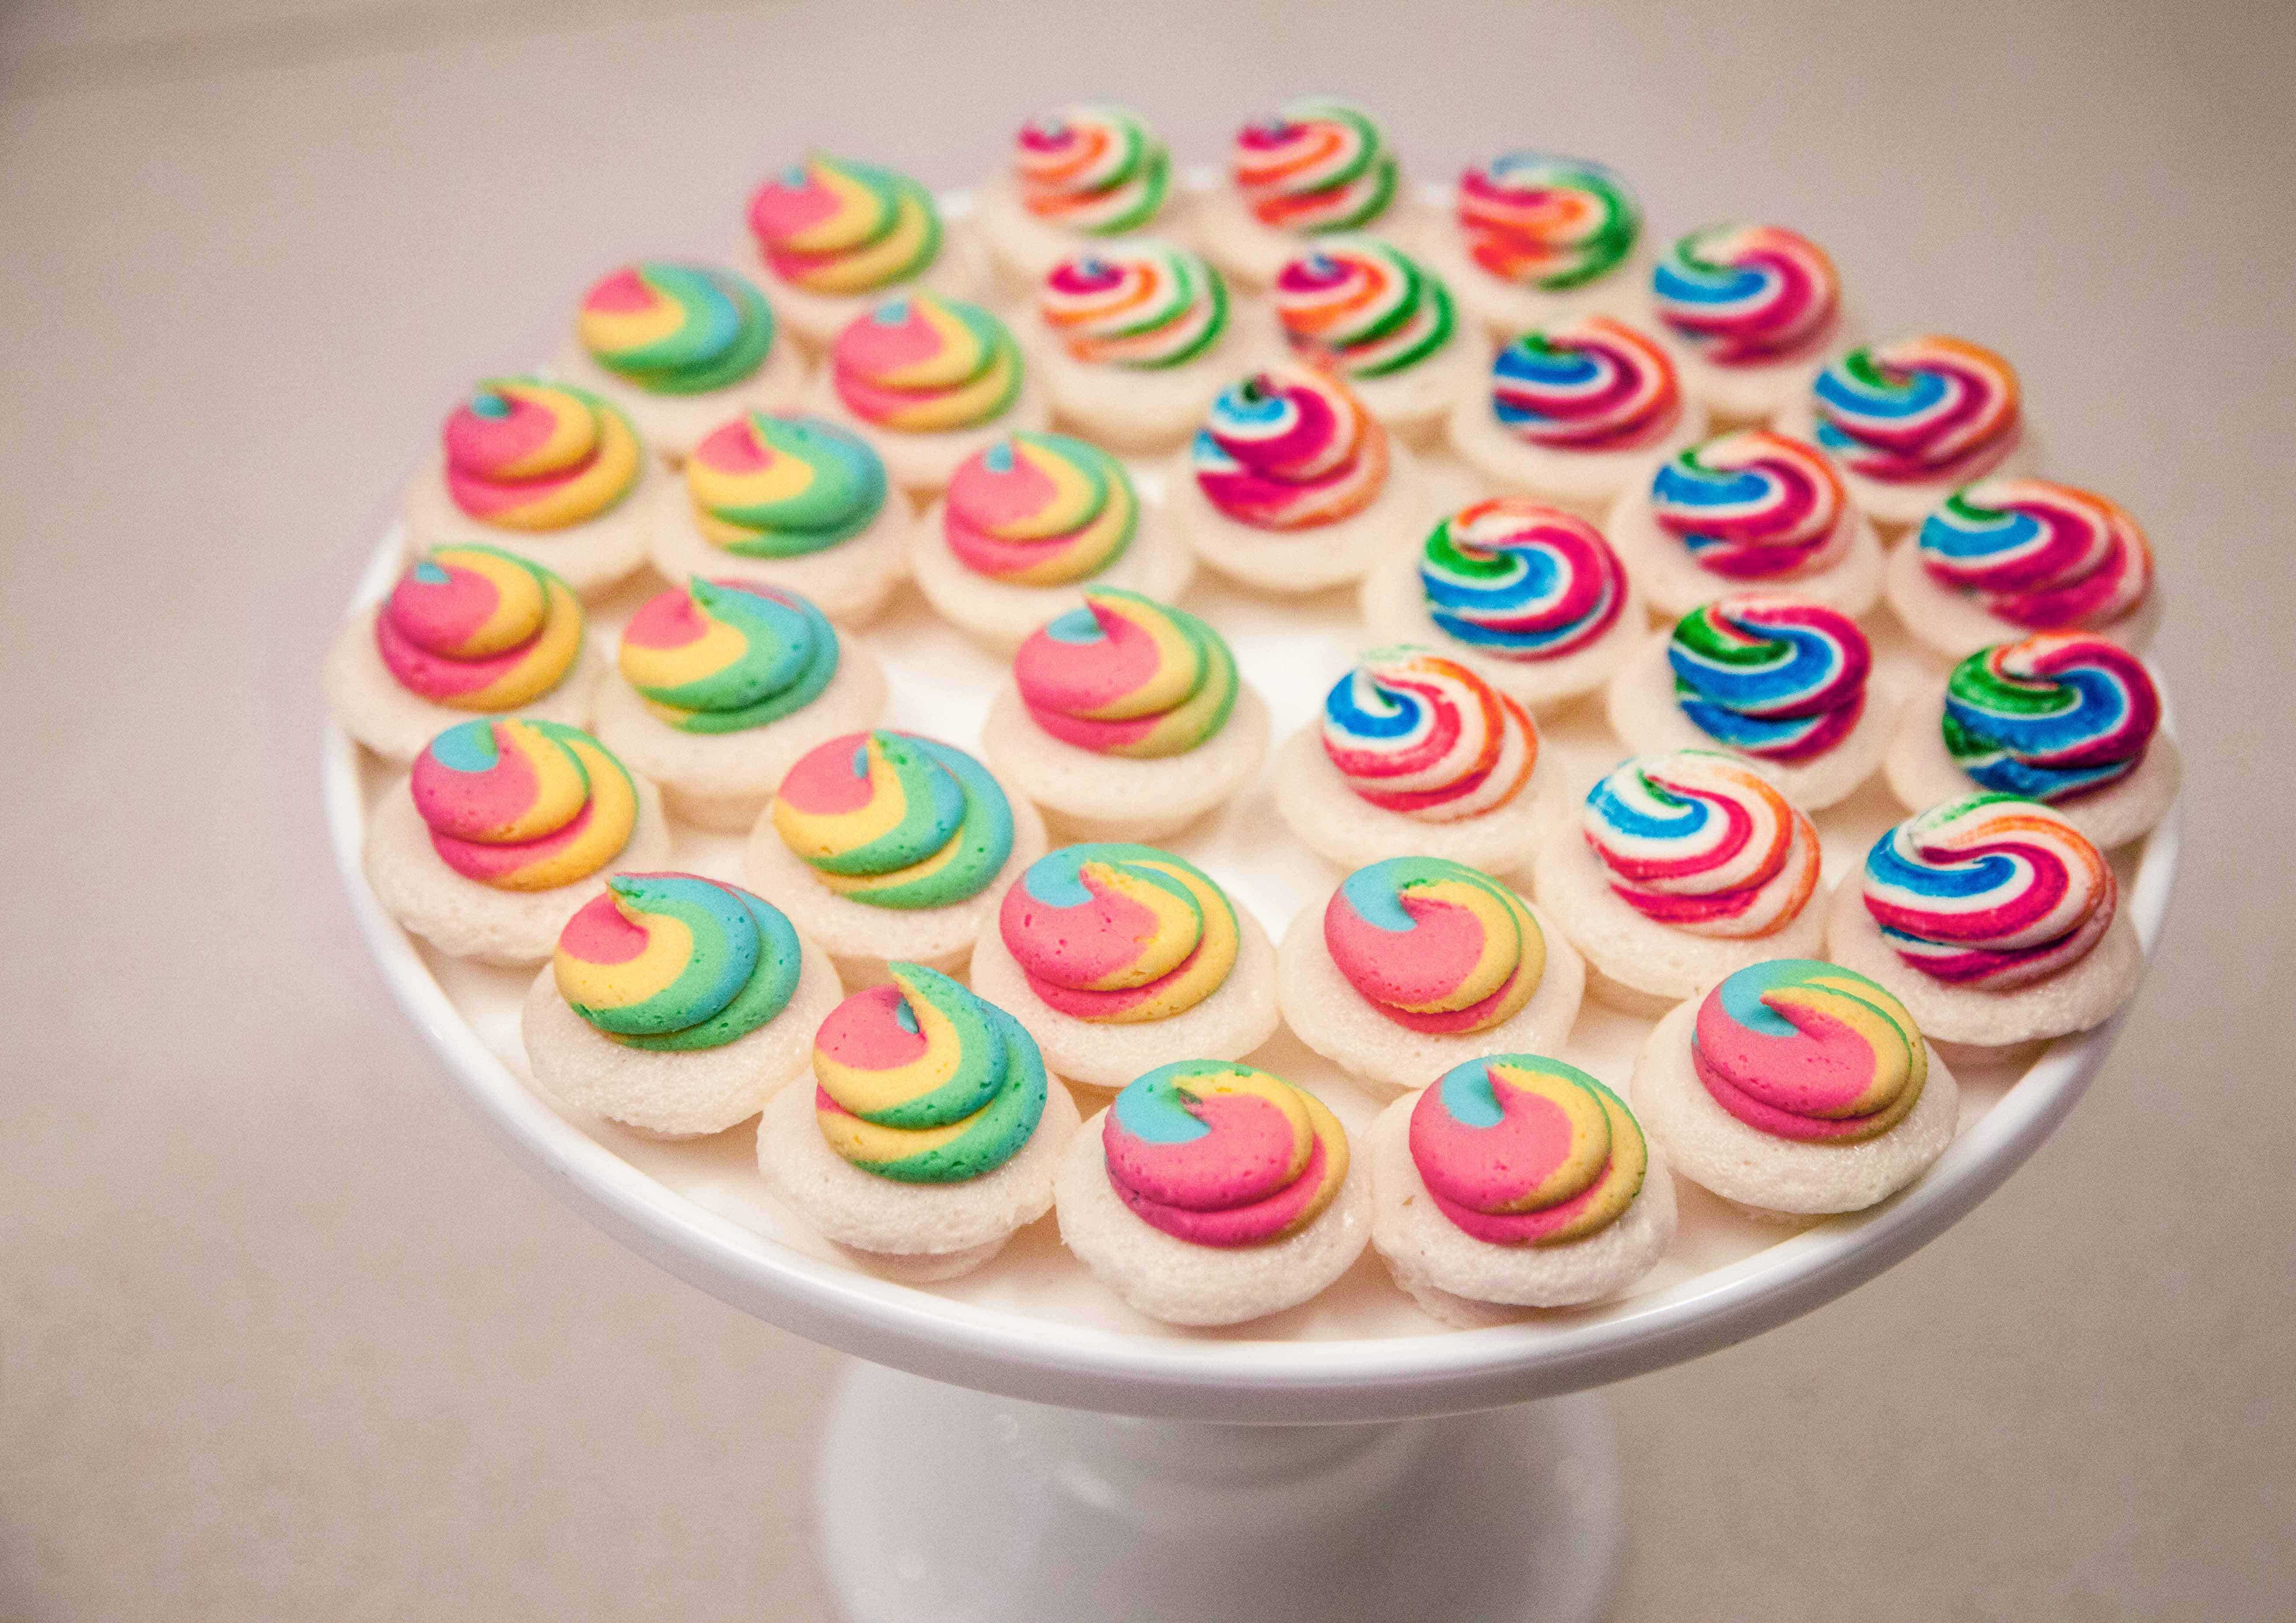
Image Tutorial For Making Tie-Dye Icing For Cupcakes
Technique 1: Painted Tie-Dye Whipped Cream Frosting
First, make basic vanilla icing using these steps:
- Whip unsalted butter (room temperature) on high until light and fluffy. It usually takes a minute or two.
- Add confectioners sugar (add a little, mix, then add a little more. So you don’t splatter)
- Add vanilla extract.
- Whip on high for 2-3 minutes.
Wa-lah! Vanilla icing, now on to the next step.

Prep your pastry bag with an icing tip and fold down the edges. With a paintbrush, paint a generous line of each color food coloring vertically along the inside of the bag. Be sure to leave about .5 – 1-inch spaces between colors (I always opt to paint the colors in rainbow order, because… rainbows). You can copy this idea for making a girl’s birthday cake, but with pastel colors.

Once you’ve painted the bag with the four food colors, use your spatula to scoop the frosting into the bag. Be careful not to smudge the lines you just painted, but if you do it’s not the end of the world, I’m sure it will still come out great. Twist the pastry bag and give it a test pipe onto a plate or some paper towels.

Now grab your cake and start piping!

You’re done! Bonapetit!

Technique 2: Multi-Colored Tie-Dye Icing
Follow the first step above (from technique 1) to make your vanilla icing, but when you’re done, divide the finished icing evenly into four mixing bowls

Next, add food coloring to the icing so you end up with 4 different colored icings

Now that your icing is done, prep your pastry bag and icing tip and fold down the edges. Grab your spatula and smear the dyed icing into the four corners of the bag, keeping the icing level in the bag – this ensures four even colors through the icing process. Your bag should look like this: (TIP: if you have a small flower vase drape the edges of the pastry bag over it to keep it open so you can use both of your hands to get the icing in the bag evenly).

Twist the icing bag and do a few test pipes on your plate or paper towel. Then begin icing!

Another masterpiece!
Suggested Read: Our Favorite Tie-Dye Cakes
Happy Caking!
Now you know all the steps and essential ingredients and tools for making tie-dye icing for cupcakes. Of course, you can always improvise with the colors or the dessert you choose to pipe this frosting on, but keep close to the steps. Making this tie-dye icing can sometimes be a tricky project! But it’s great to face a challenge because it puts muscles to our experiences.
So, now it’s your time to share your experience with this tutorial with all of us! Please tell us how it was and show us your results in the comments section below! Also, if you have further questions about the tie-dye frosting tutorial, do not hesitate to share them. I am here for you and all your sweet projects!
You can also try making Fall Cupcakes, Rainbow Cupcakes, or Cookies with Royal Icing.
Enjoy and Happy Caking!

Wonderful so creative and really appreciate your work.Sure i will try this recipe.
Well done and Happy Baking
Cookie gifts
Thank you for sharing both these brilliant techniques. I also would go in rainbow colours, but I guess you could do varying shades of the same colour? Pinned. Sammie